← Back to Teaching Daily
TEACHING DAILY / BOOK ARTS
Making a Flag Book
A flag book is a playful book structure made with
an accordion-folded spine and overlapping paper
flags. In this tutorial, I'll walk you through
the process of creating your own flag book,
one step at a time.
What You'll Need
- Cardboard
- 2 Colored Paper 9x9 inc (can be different colors), for spine
- Colored Paper (can be different colors), for flag
- Decorative Paper
- Sticky Notes (2 different colors)
- Bone Folder
- GLue Stick
- Scissors and Ruler
- Optional Cutting Mat
01
Folding
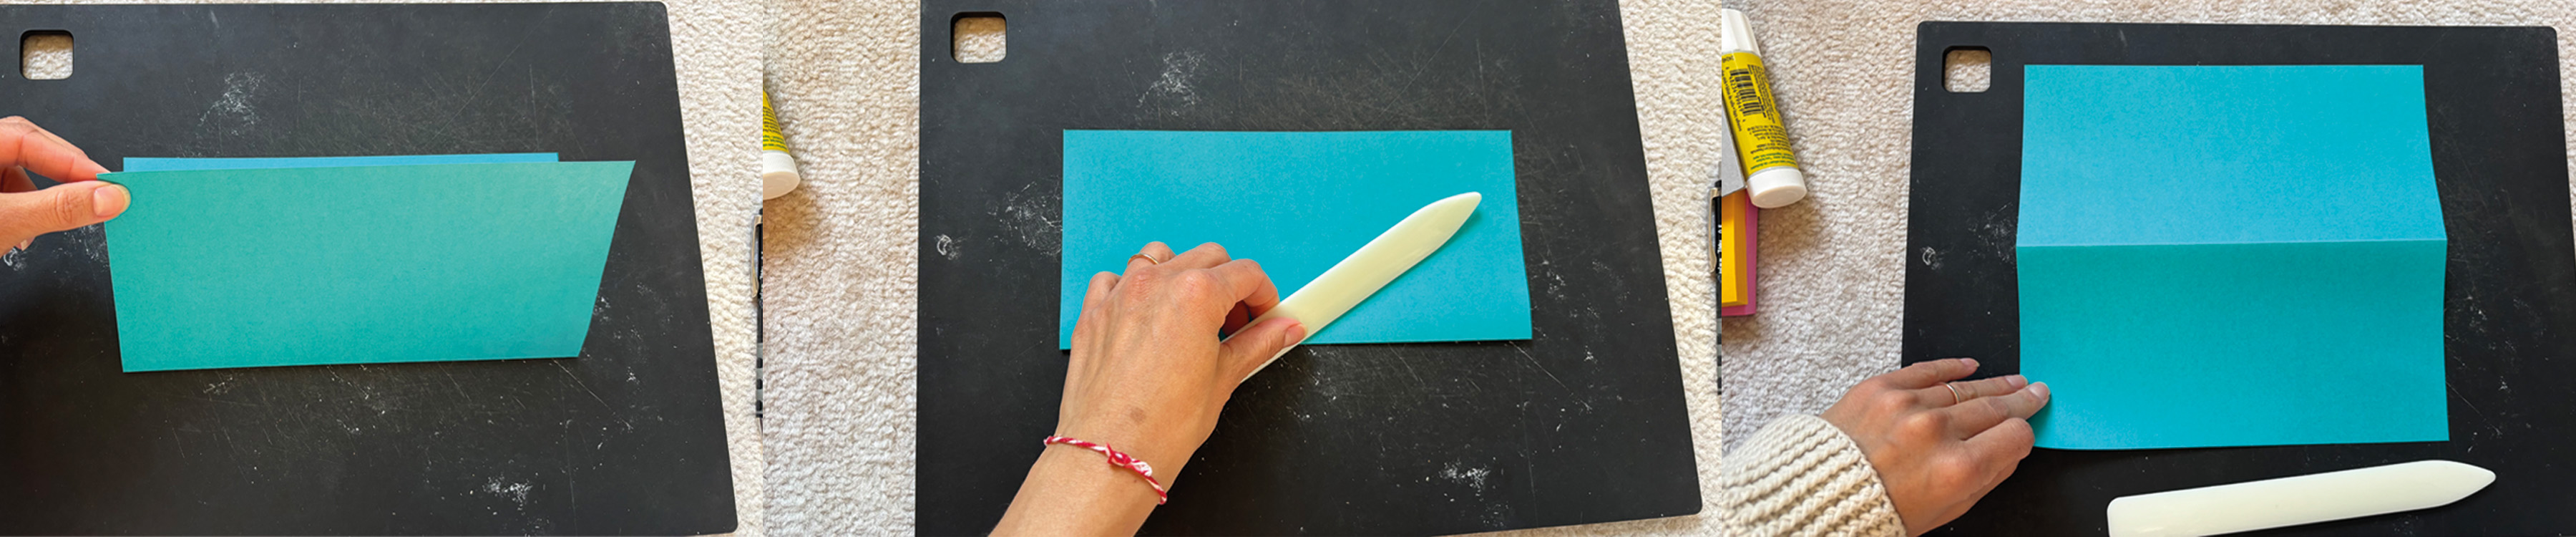
1a – Fold, Fold, Fold!
Let's start by creating the spine of our book.
Take a 9 × 9-inch sheet of colored paper and
fold it in half by bringing the bottom edge
up to meet the top edge. Unfold the paper and
fold it again along the same crease to make
it more flexible.
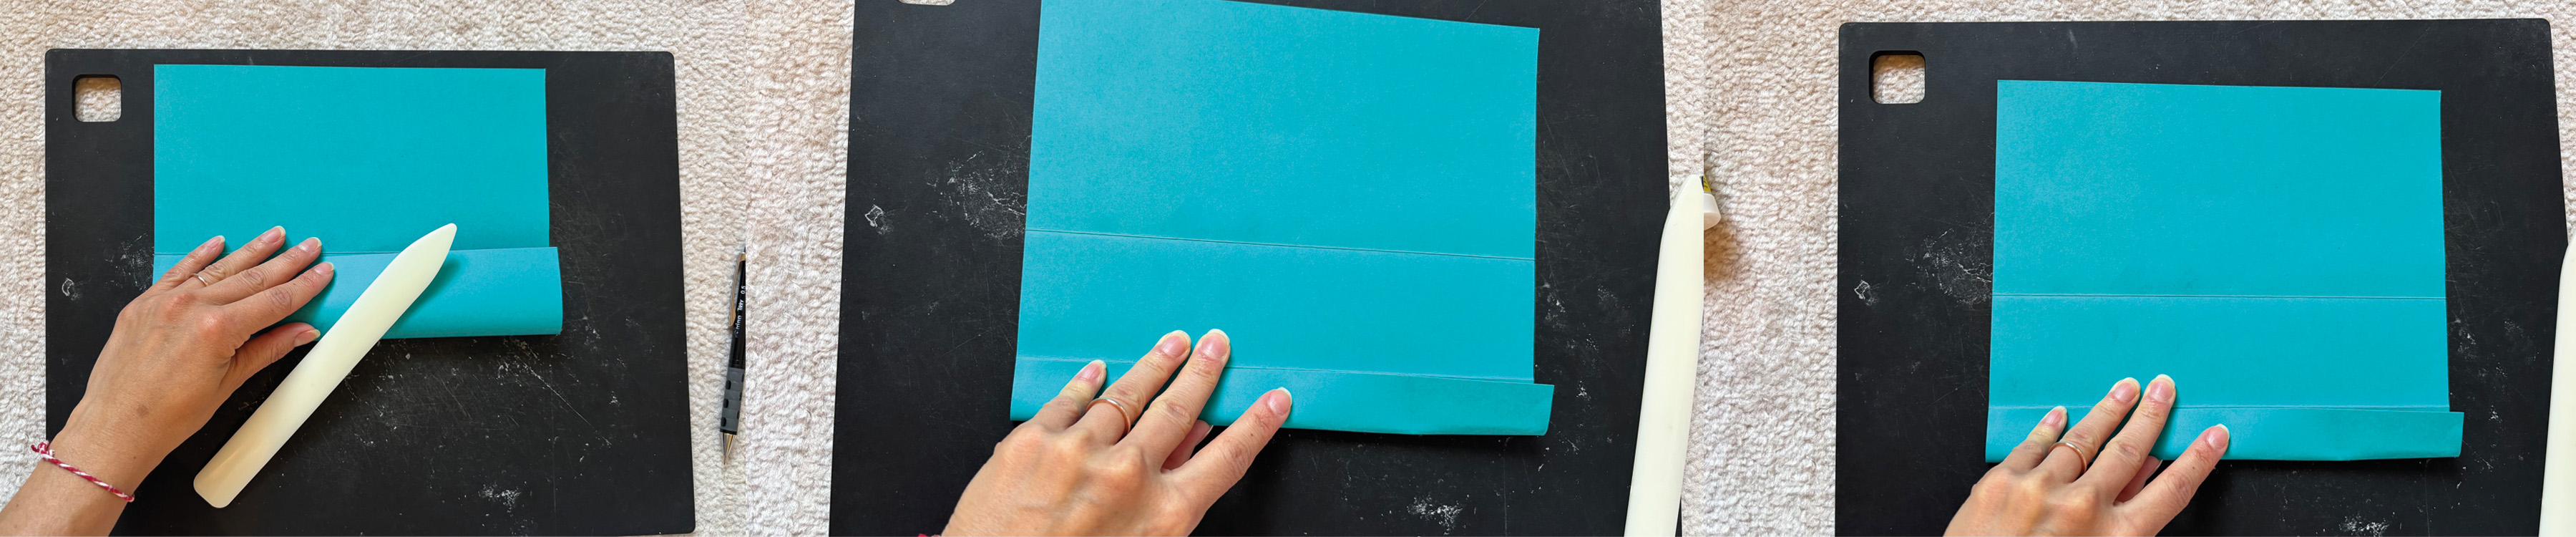
1b – Creating the Accordion
Fold the top and bottom edges toward the center
crease. Continue folding each section in half,
using the existing creases as guides. Unfold
and refold along the creases in alternating
directions to create an accordion structure.
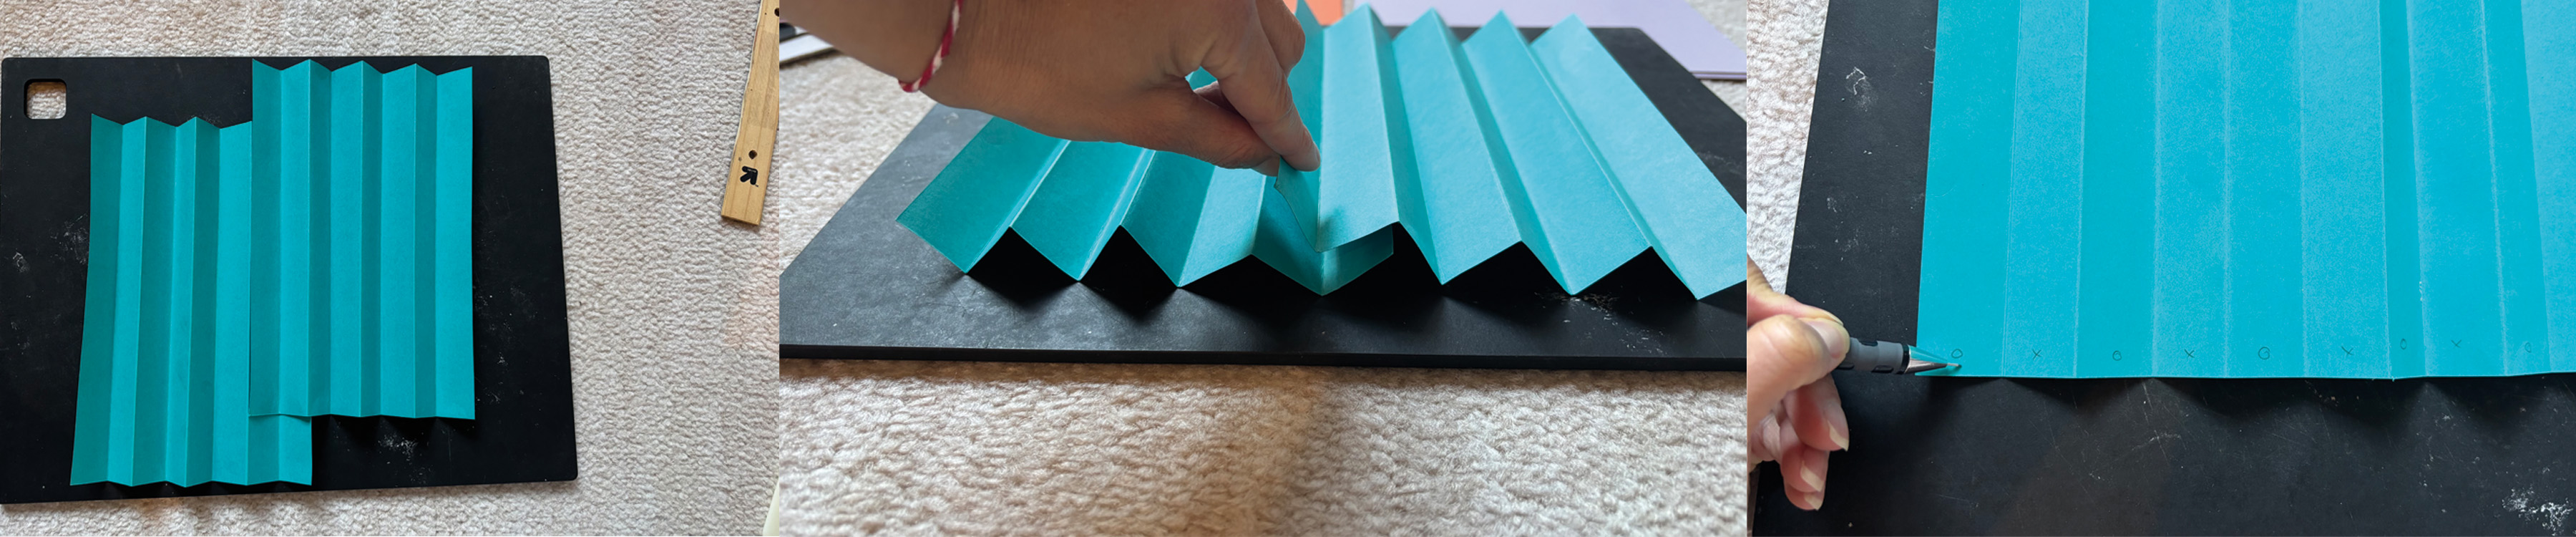
1c – Connect and Mark
Repeat the folding process with your second
sheet of paper. Overlap the ends of the two
accordions and glue them together to create
one continuous spine. Lay it flat and mark
the sections along the bottom edge,
alternating between "O" and "X."
These marks will guide where to attach
the flags in the next step.
02
Creating the Flags
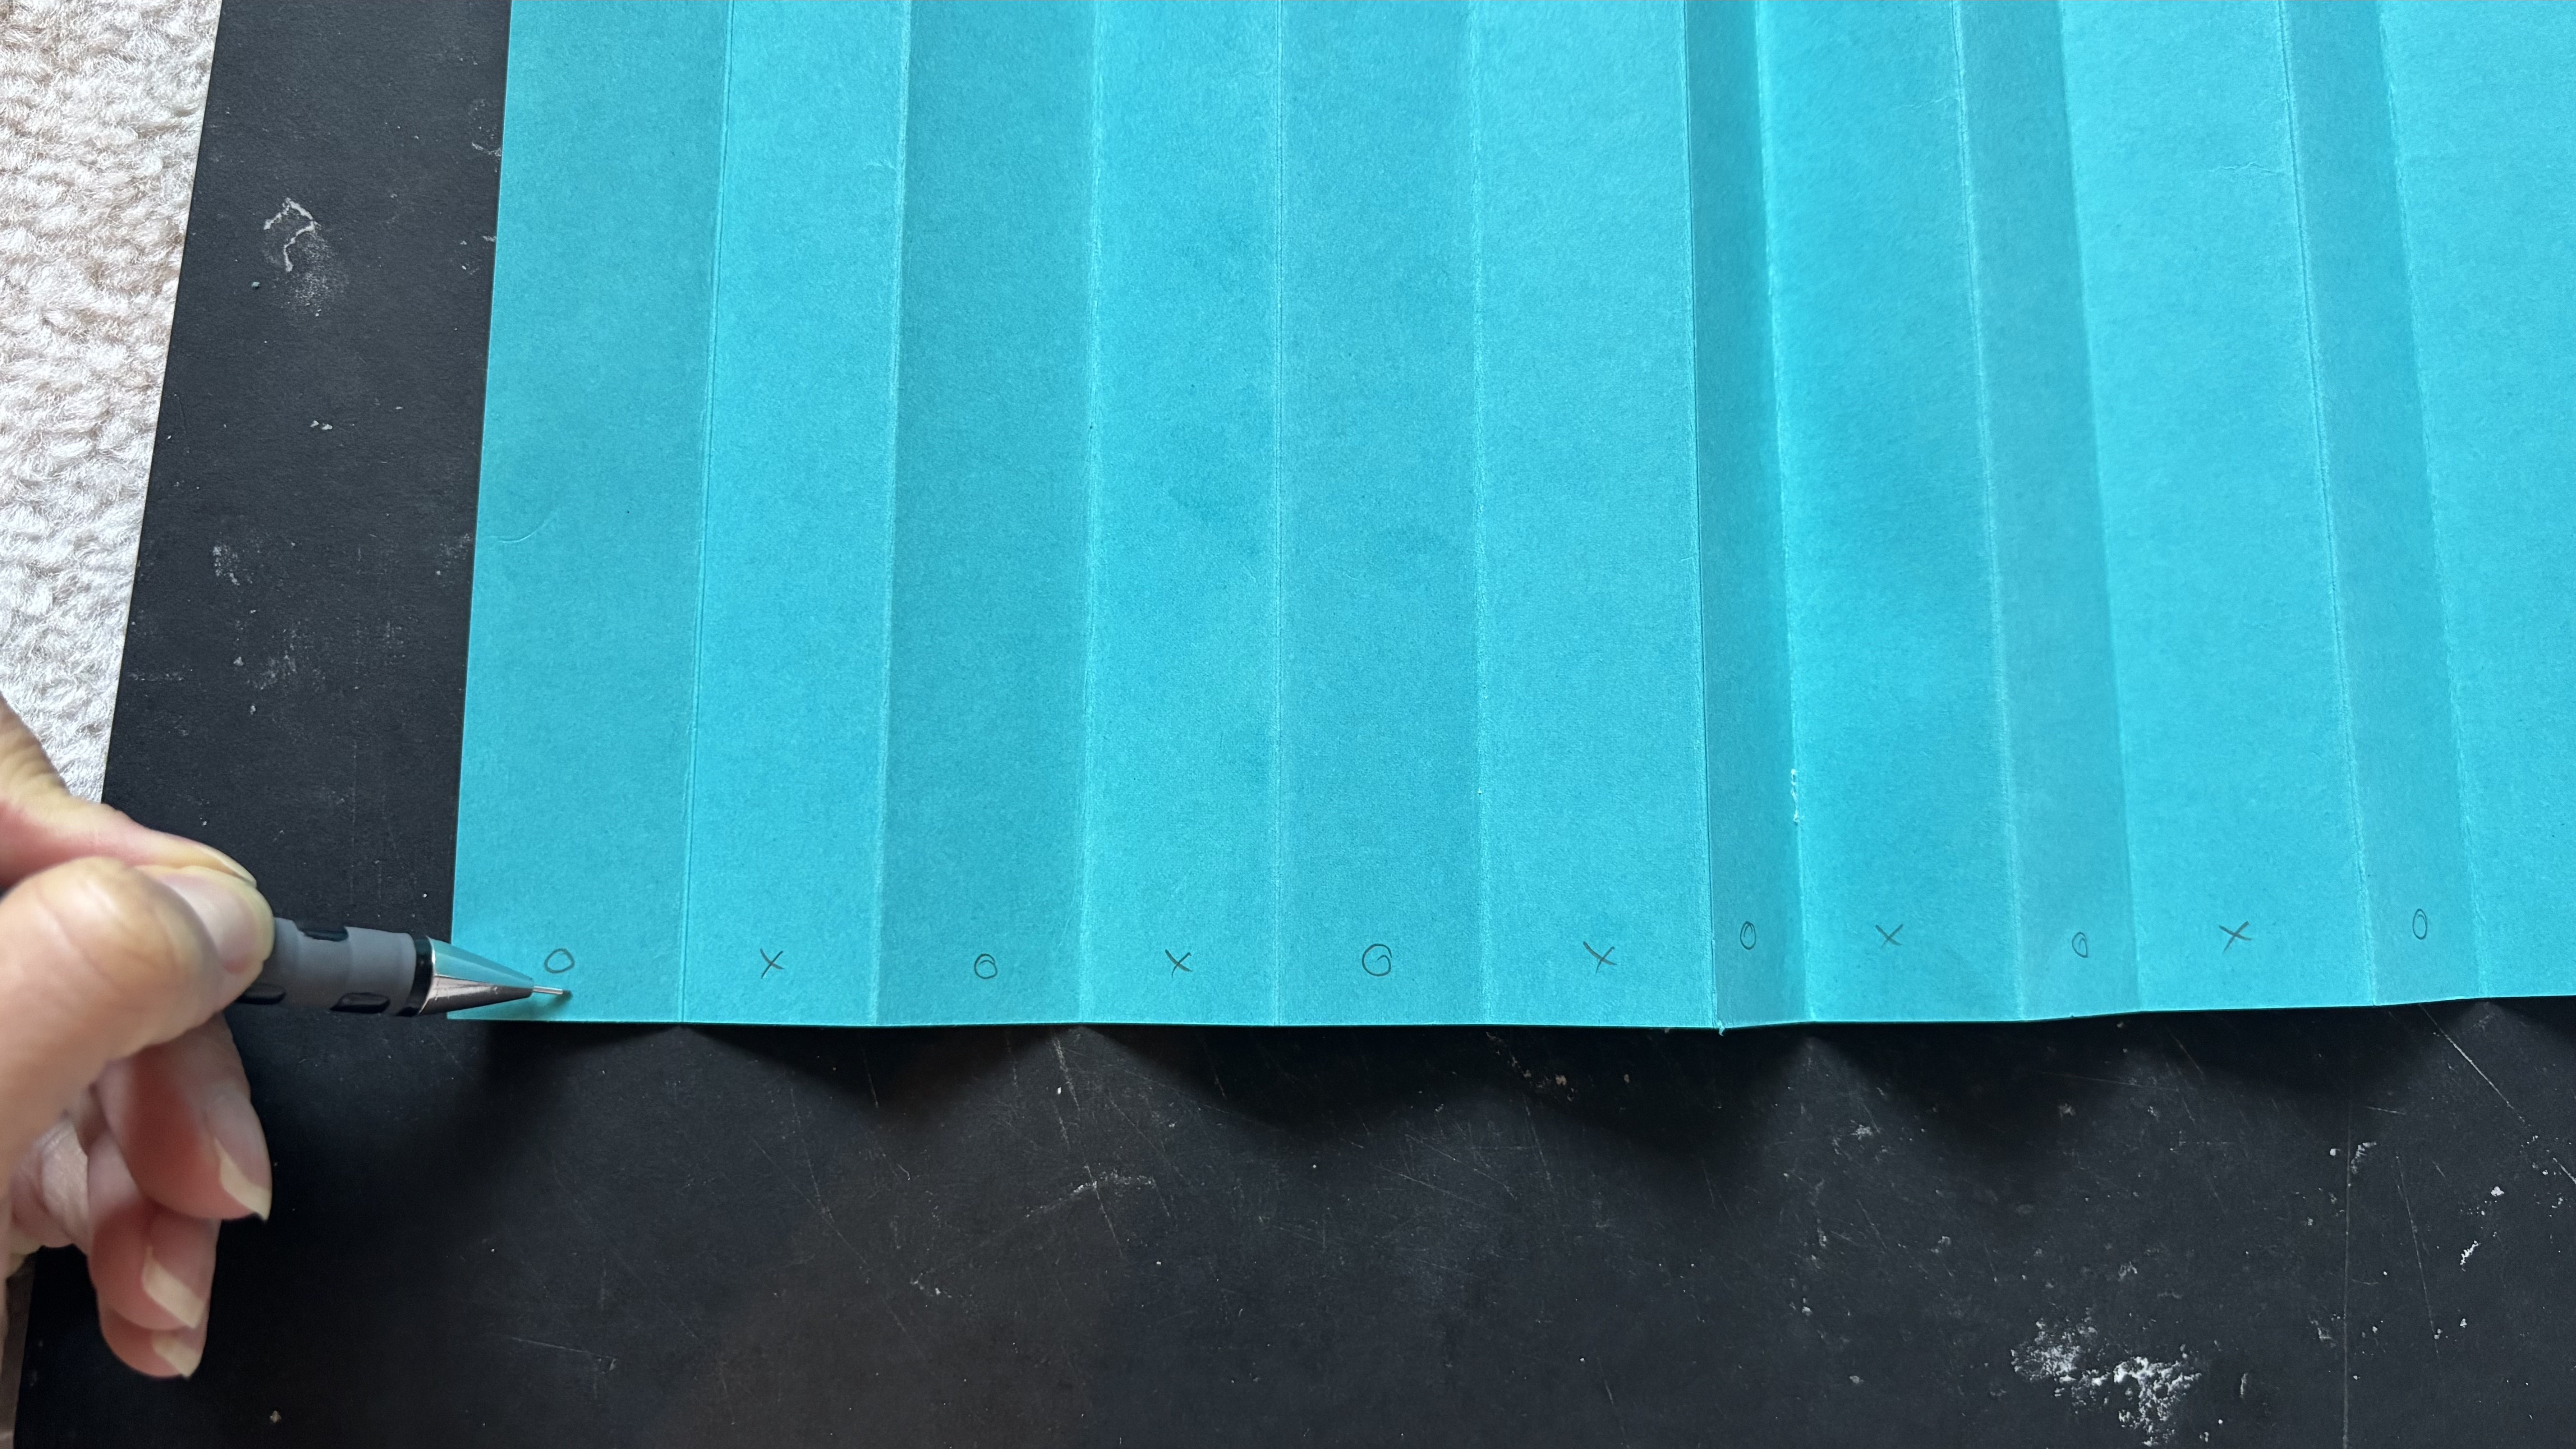
2a – Flags Are on the Way!
After connecting the two accordions, we should
have 14 sections in total. Let's number them
and mark the odd-numbered sections with an "O"
and the even-numbered sections with an "X."
These marks will help guide us when attaching
the flags.
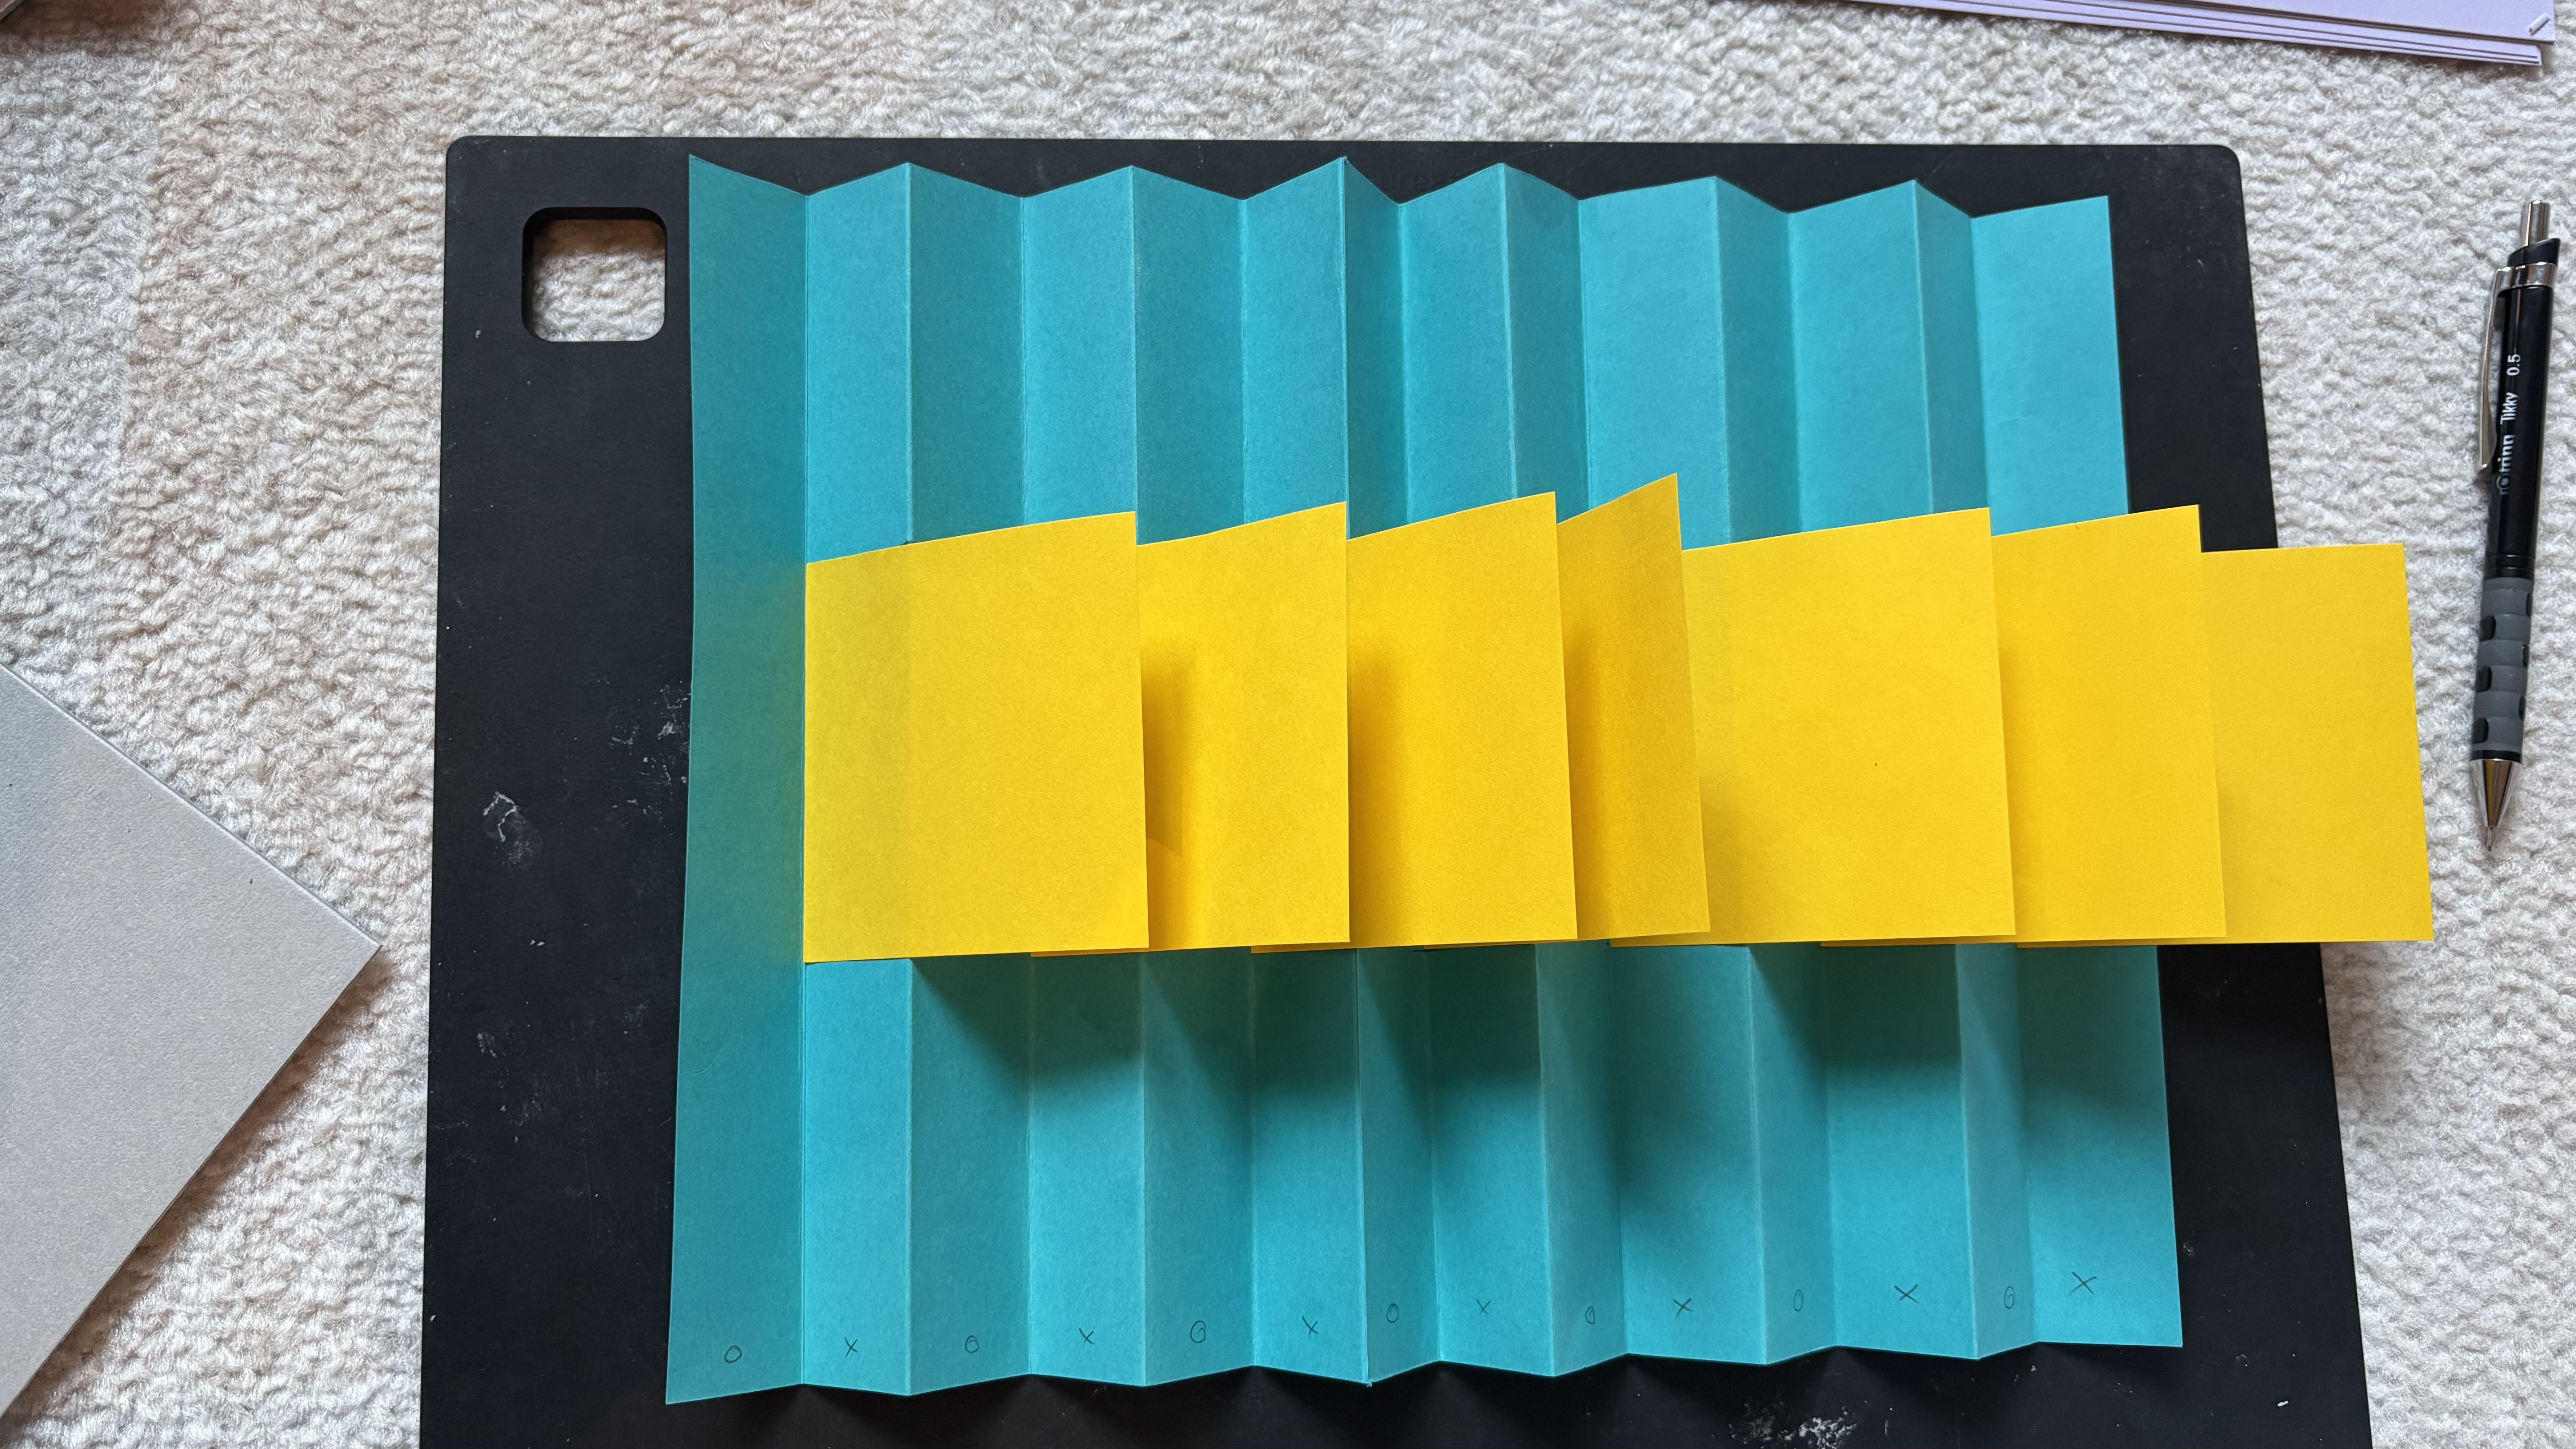
2b – A Little Color Coding!
Let's use two different colors of sticky notes
as temporary guides. Place one color on the
sections marked "X" and the other color on
the sections marked "O." This will help us
visualize where the flags will go before
gluing them into place.
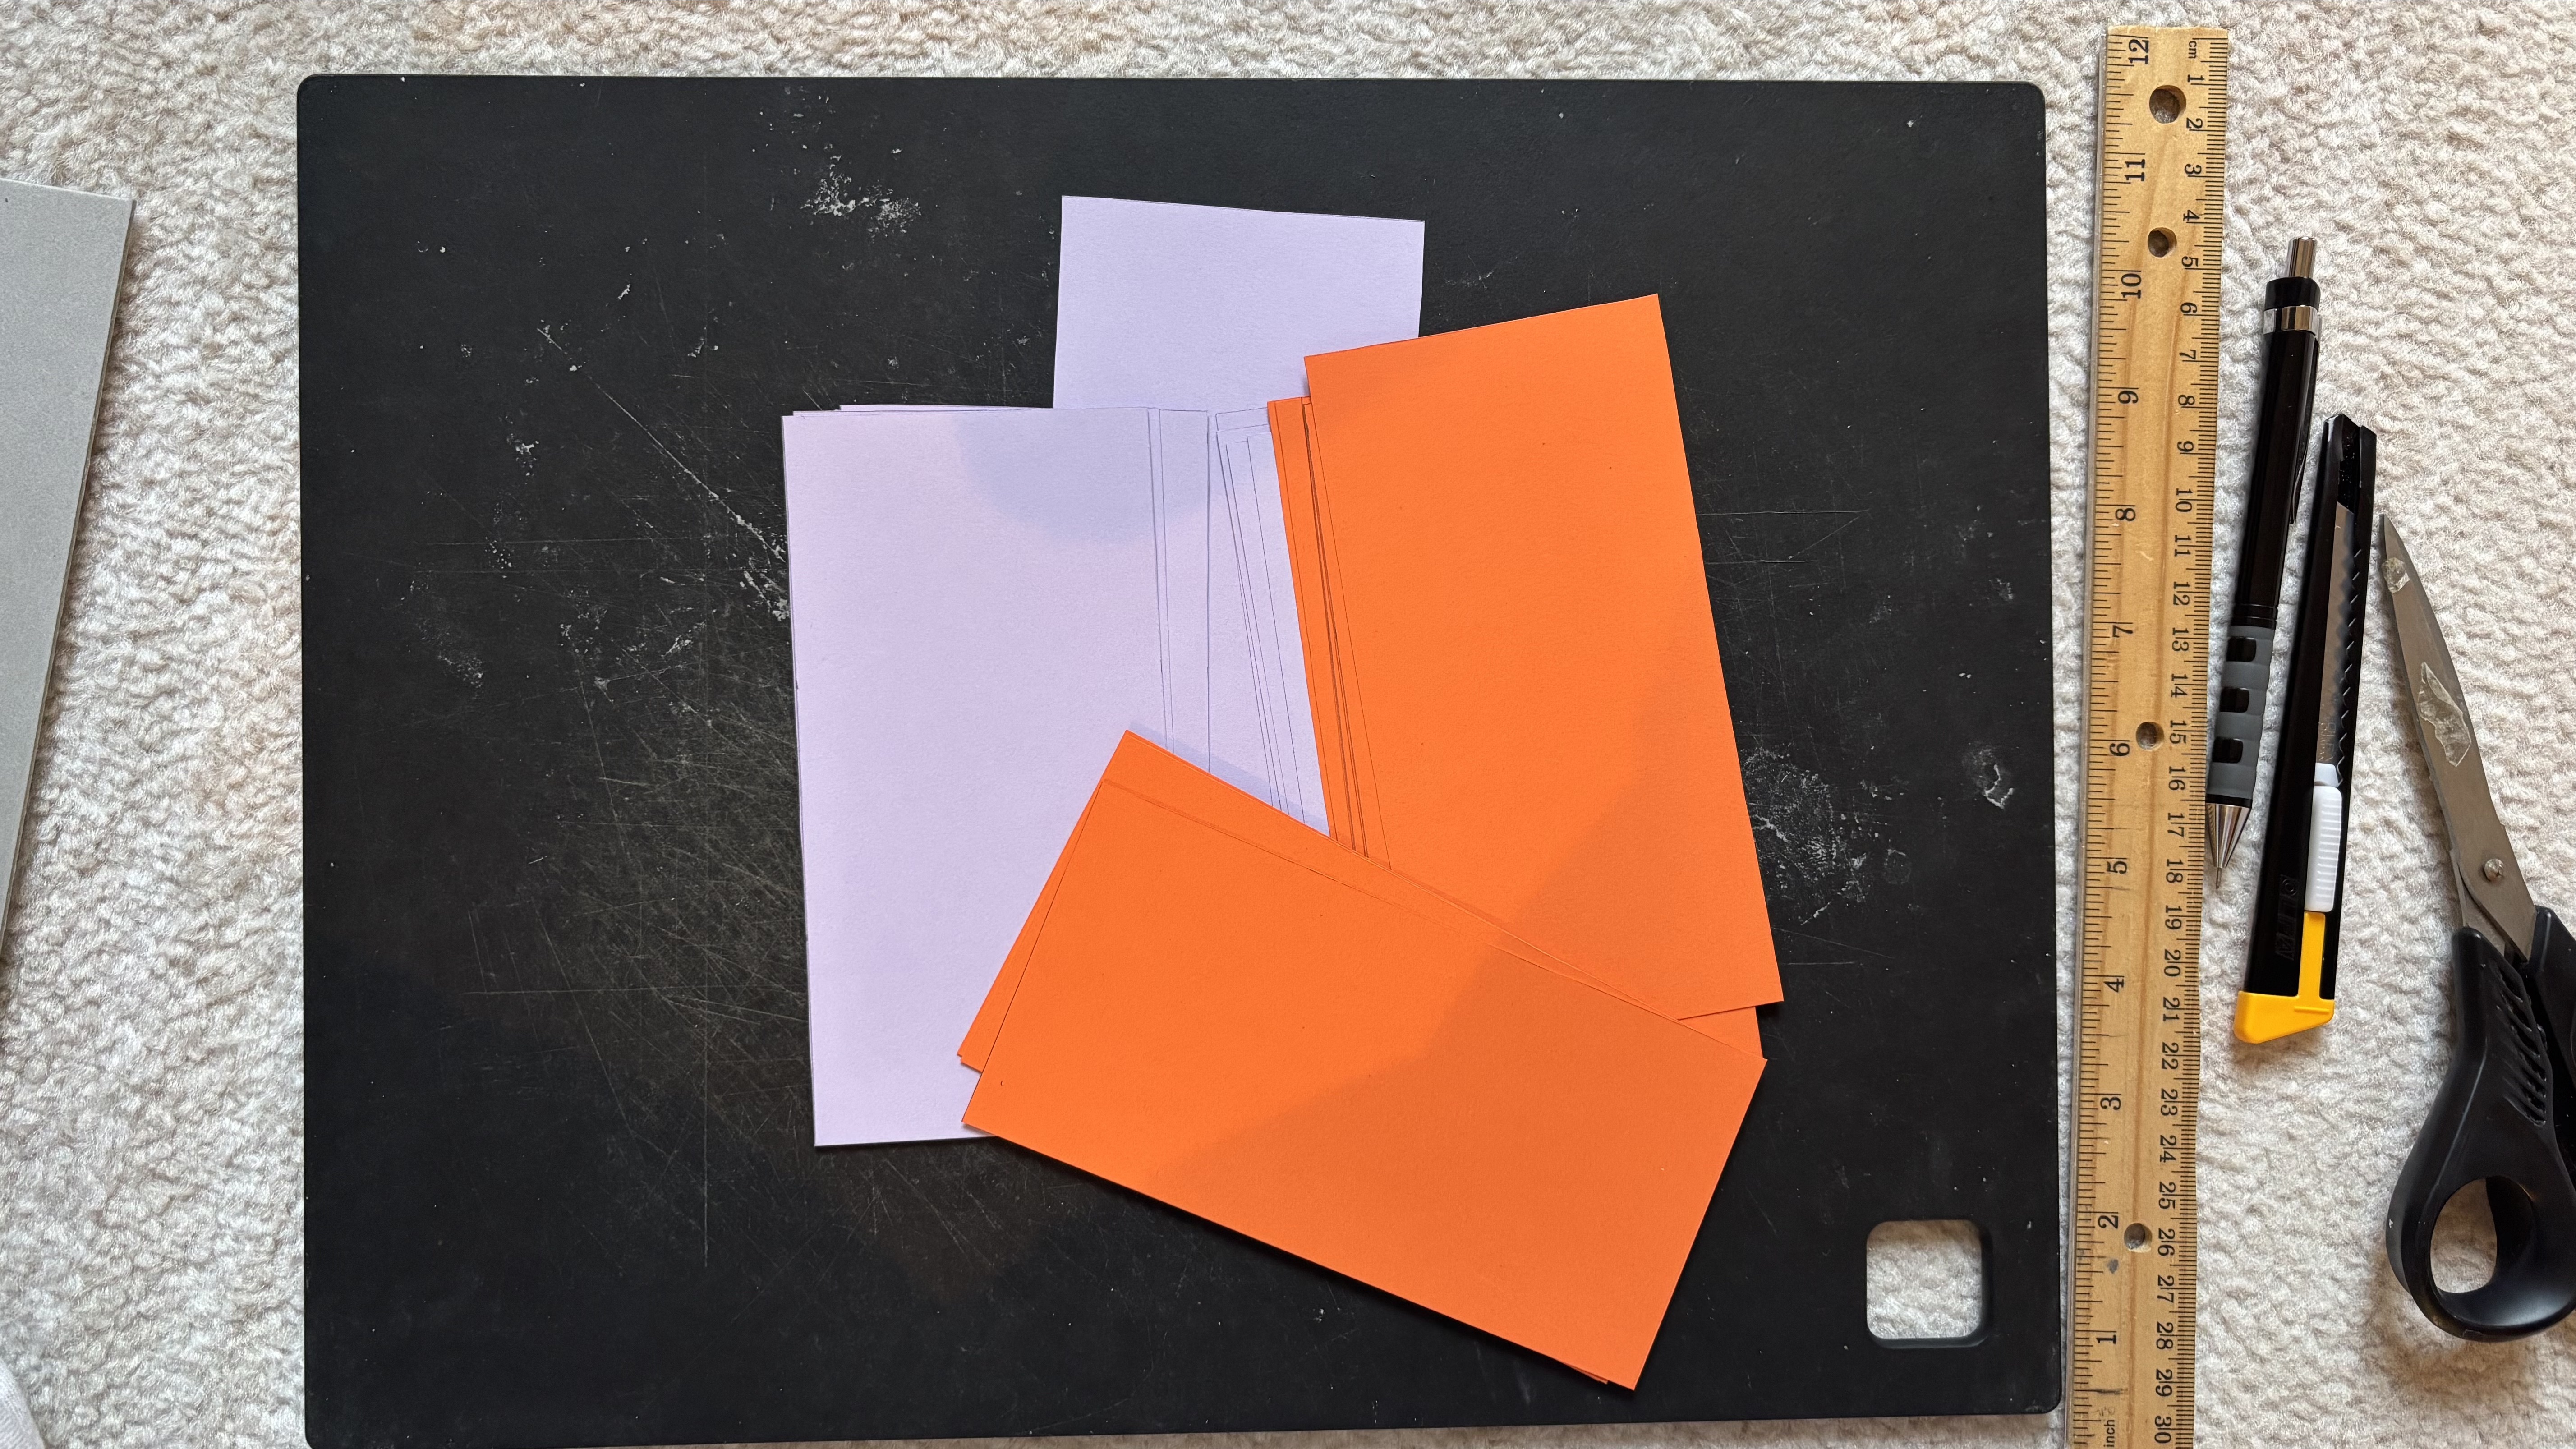
2c – Cut, Create, and Attach!
Cut your colored paper into 3 × 7-inch
rectangles. You'll need 21 flags in total.
Once they're ready, you can either remove
the sticky notes and glue the flags in place
or decorate the flags with your own drawings
before attaching them.
P.S. – My Little Tip!
I prefer decorating my flags before gluing them
into the book. Also, since the accordion spine
isn't attached to a cover yet, I find it easier
to attach the flags starting from the last
section and working my way toward the first.
03
It's Cover Time!
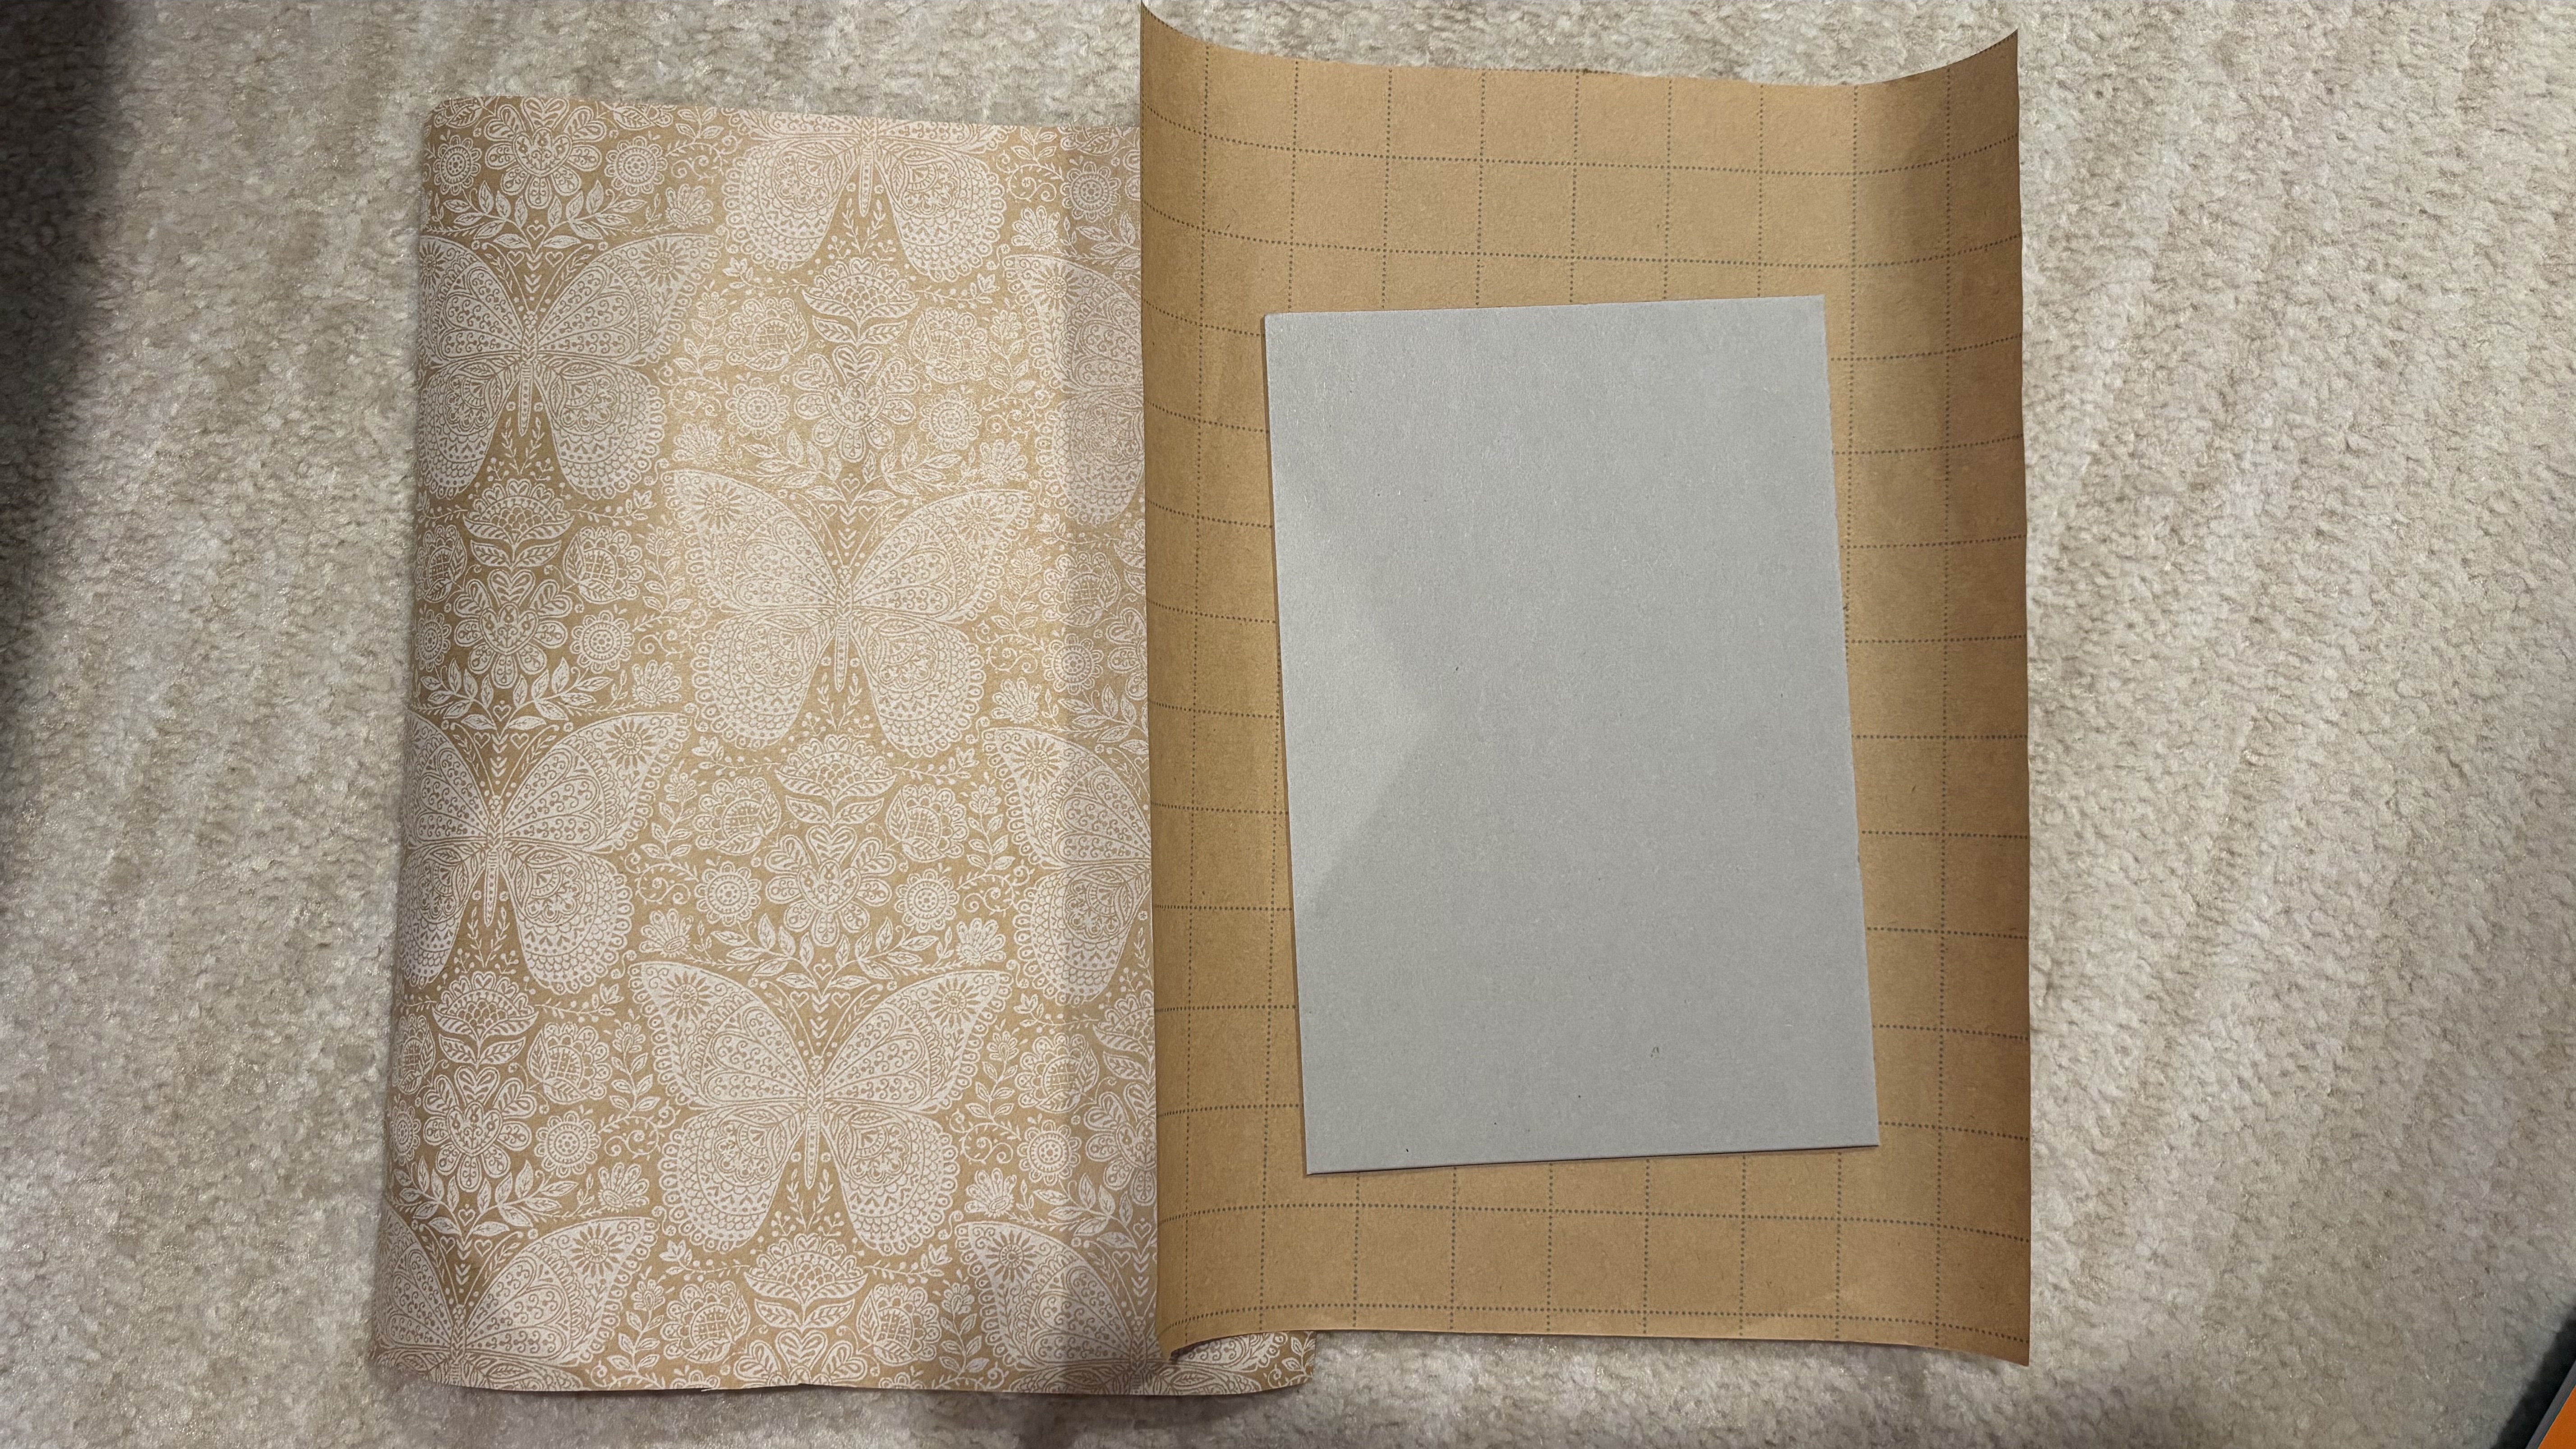
3a – Let's Get Covered!
Take a 9 × 6-inch piece of cardboard and a
sheet of decorative paper. The decorative
paper should be larger than the cardboard,
leaving enough space around the edges for
folding. Place the cardboard in the center
of the paper, making sure the decorative
side is facing down.
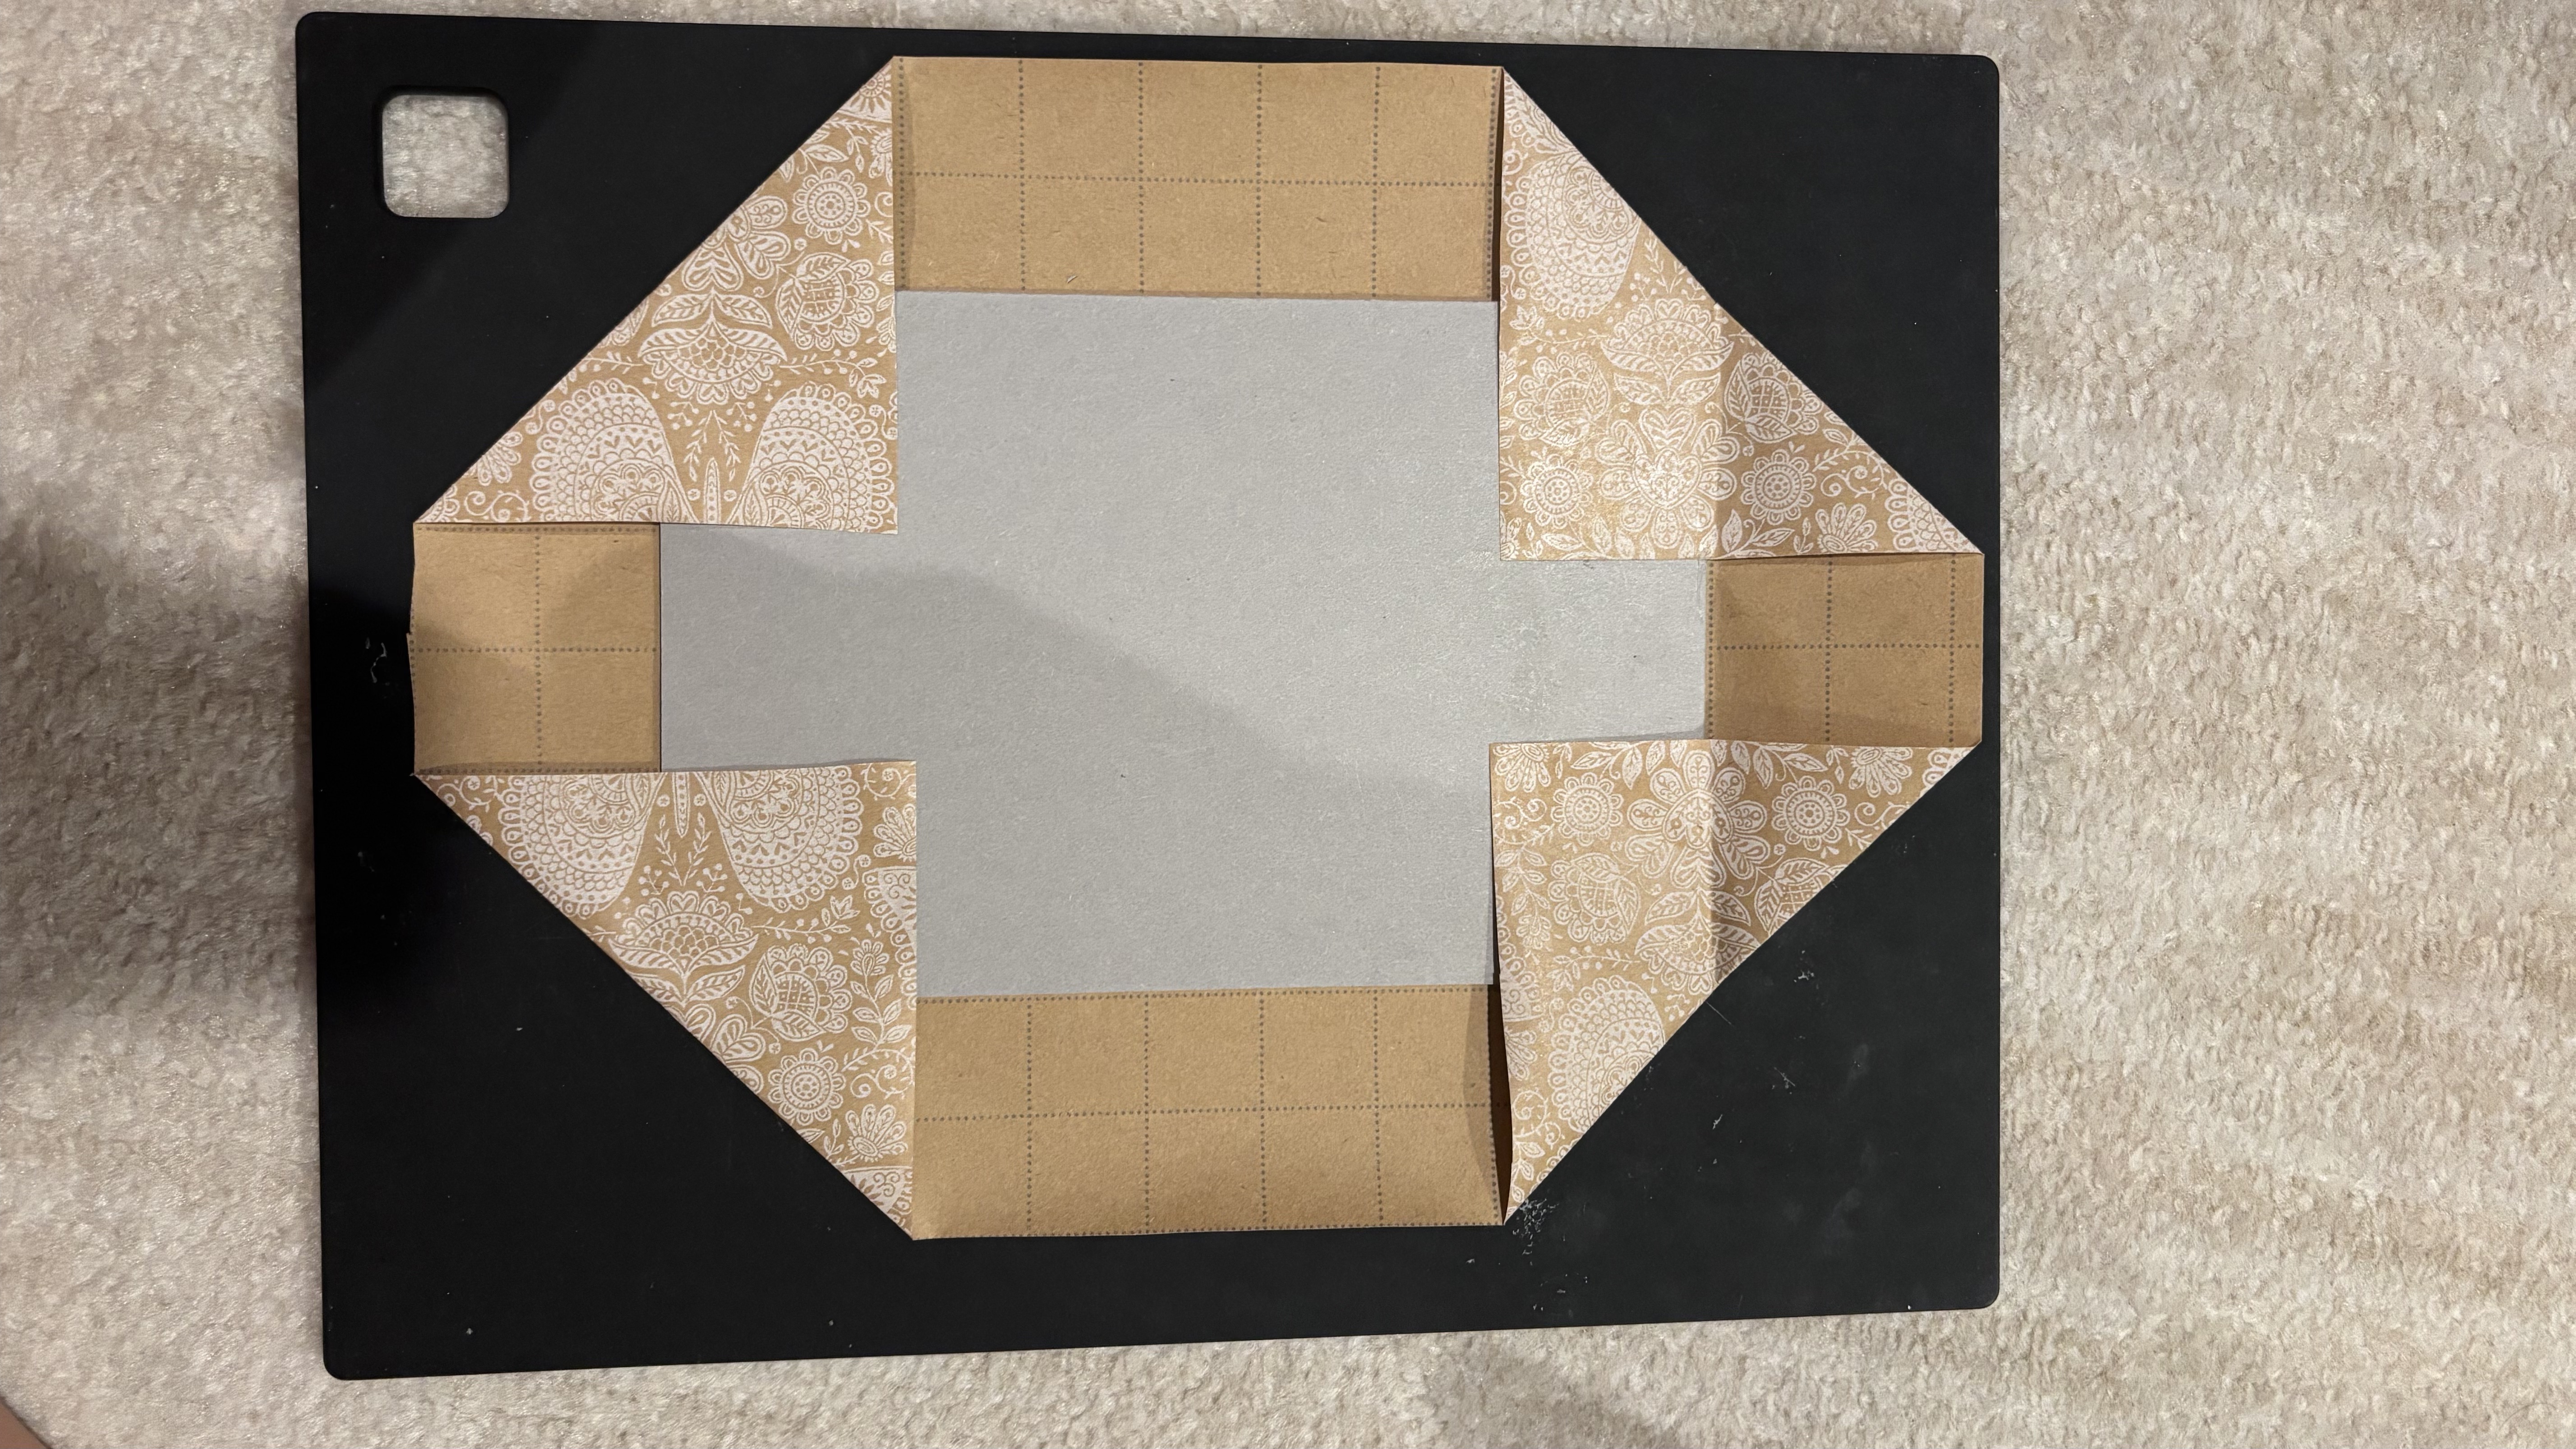
3b – Fold, Crease, and Glue!
Start by folding the corners of the decorative
paper inward, as shown in the photo. Then,
fold each side over the cardboard, using a
bone folder to create clean, sharp creases.
Apply glue to the folded edges to secure them
in place. There's no need to glue the cardboard
directly to the decorative paper!
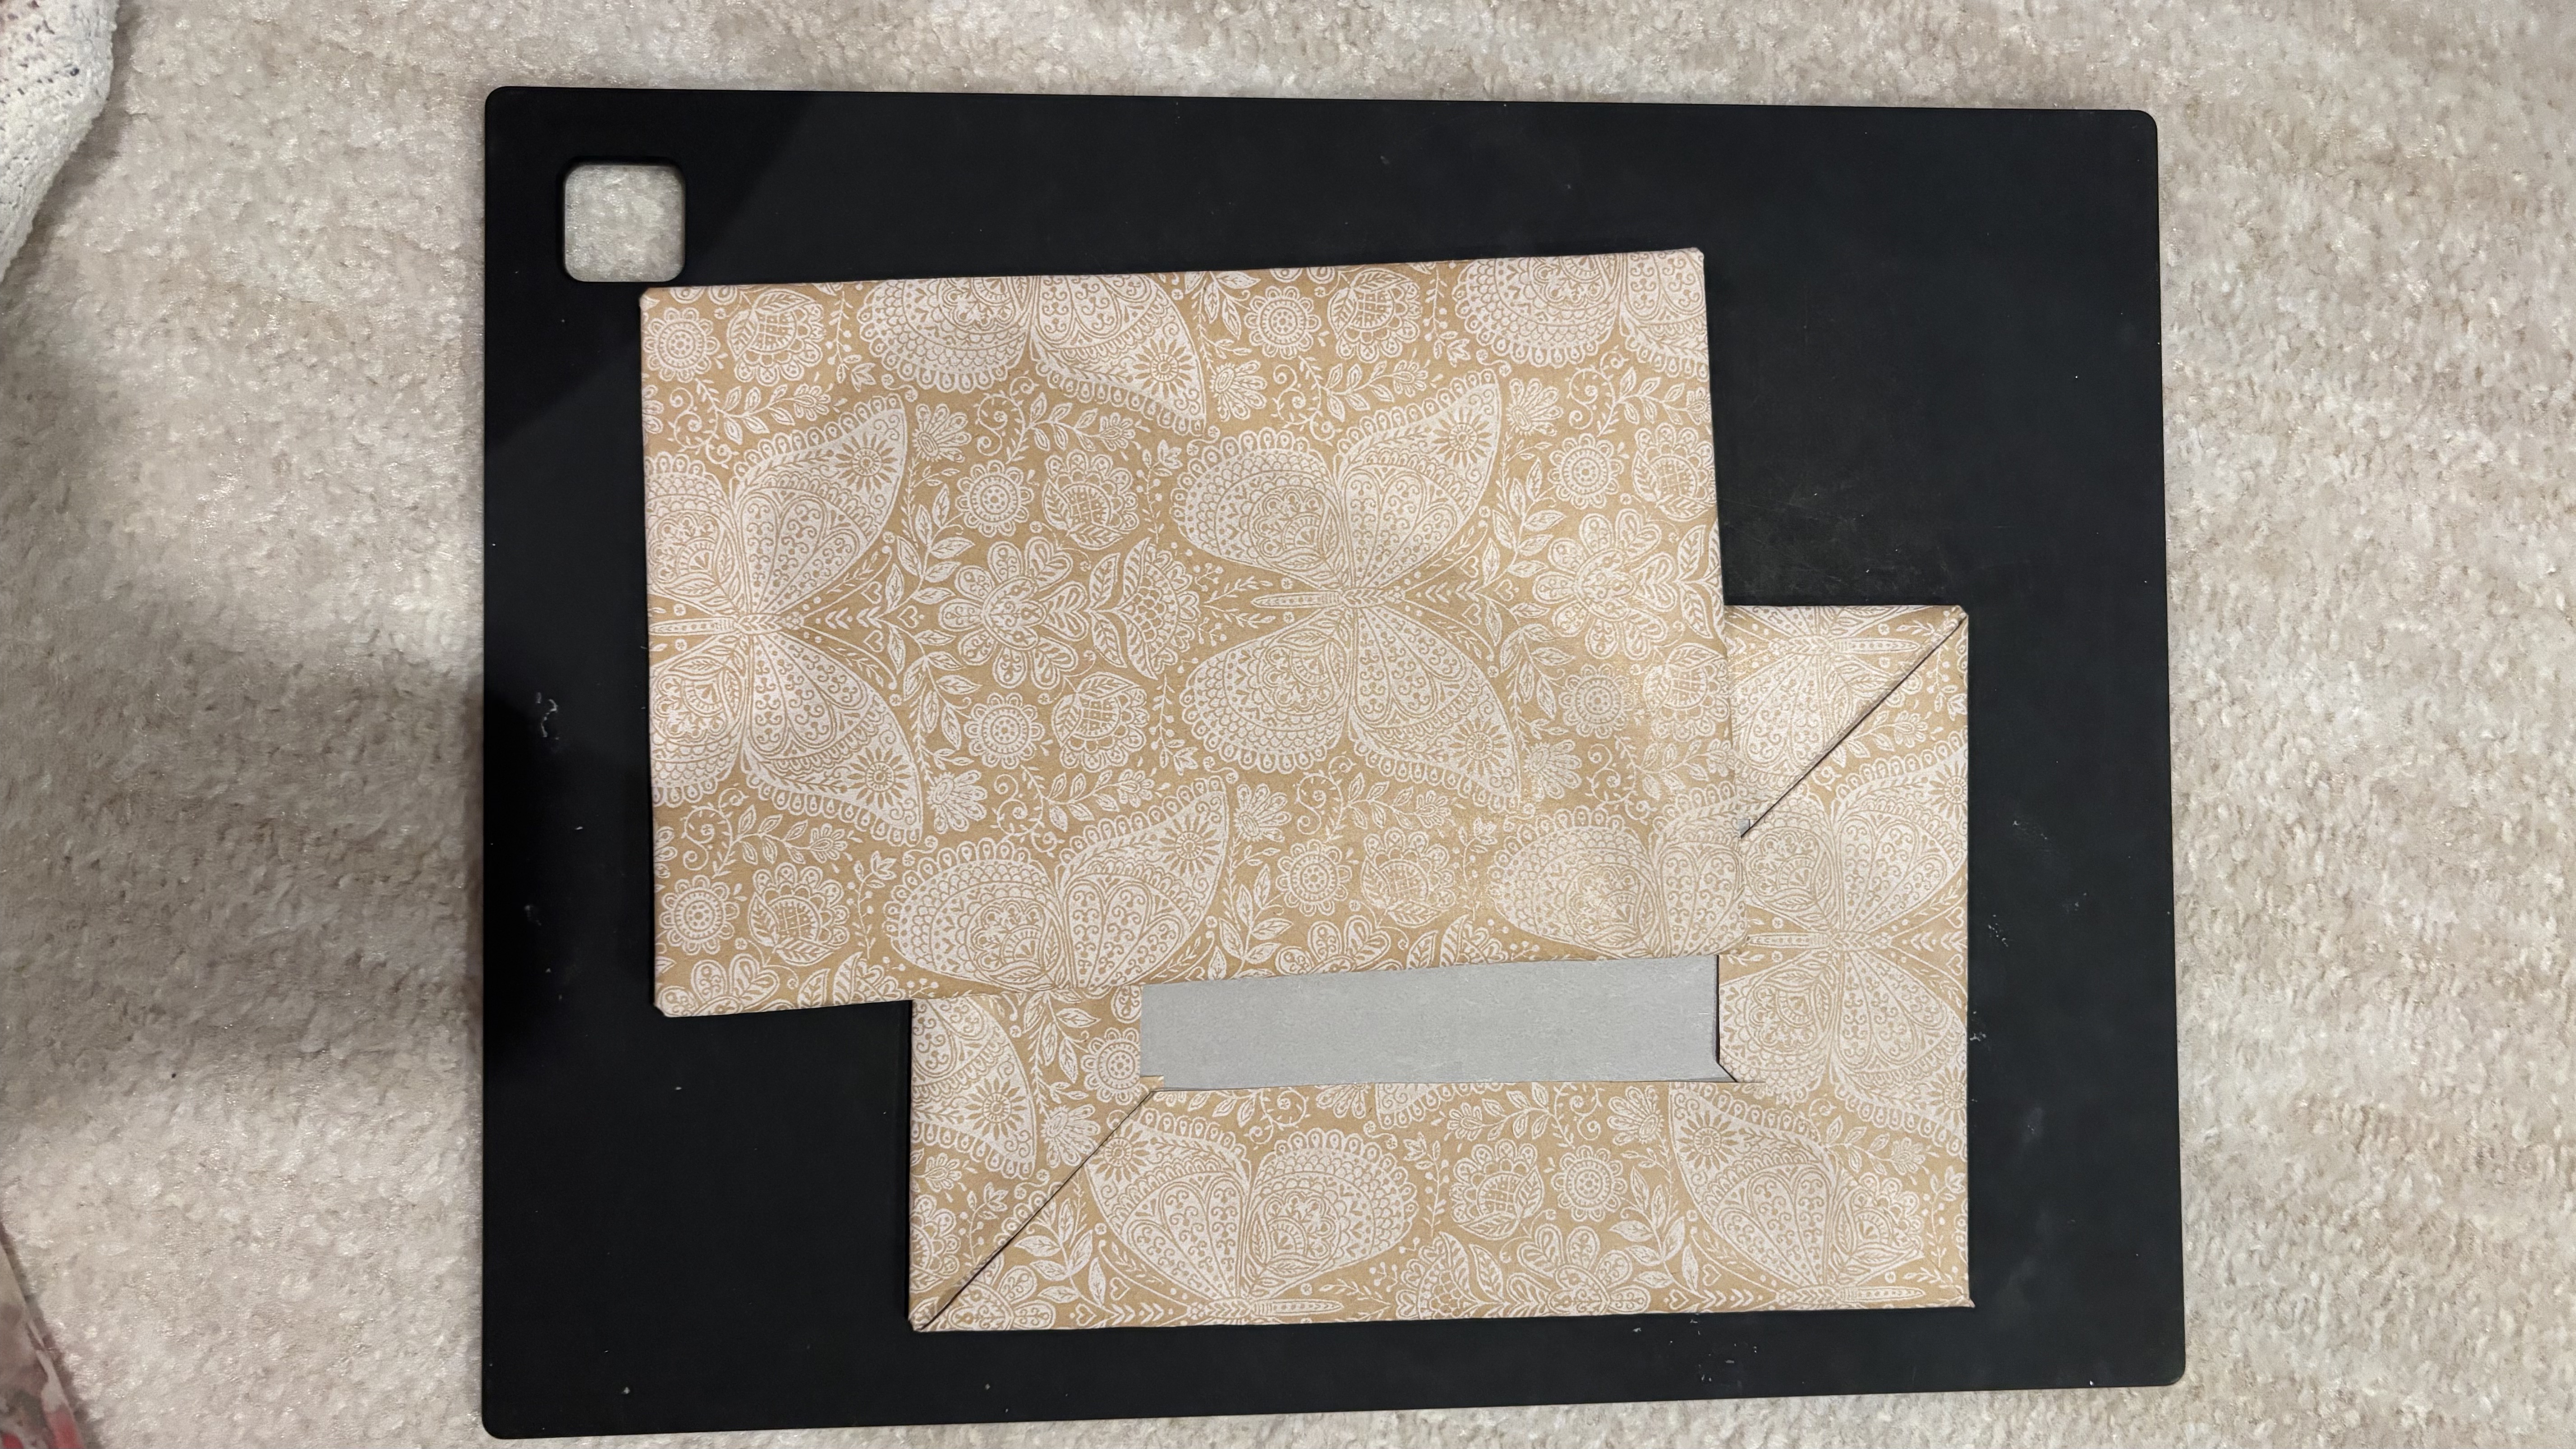
3c – One More to Go!
Repeat the same process with your second piece
of cardboard and decorative paper. Make sure
all the edges are neatly folded and securely
glued. Now you have two beautiful covers ready
for your flag book!
04
Binding Time!
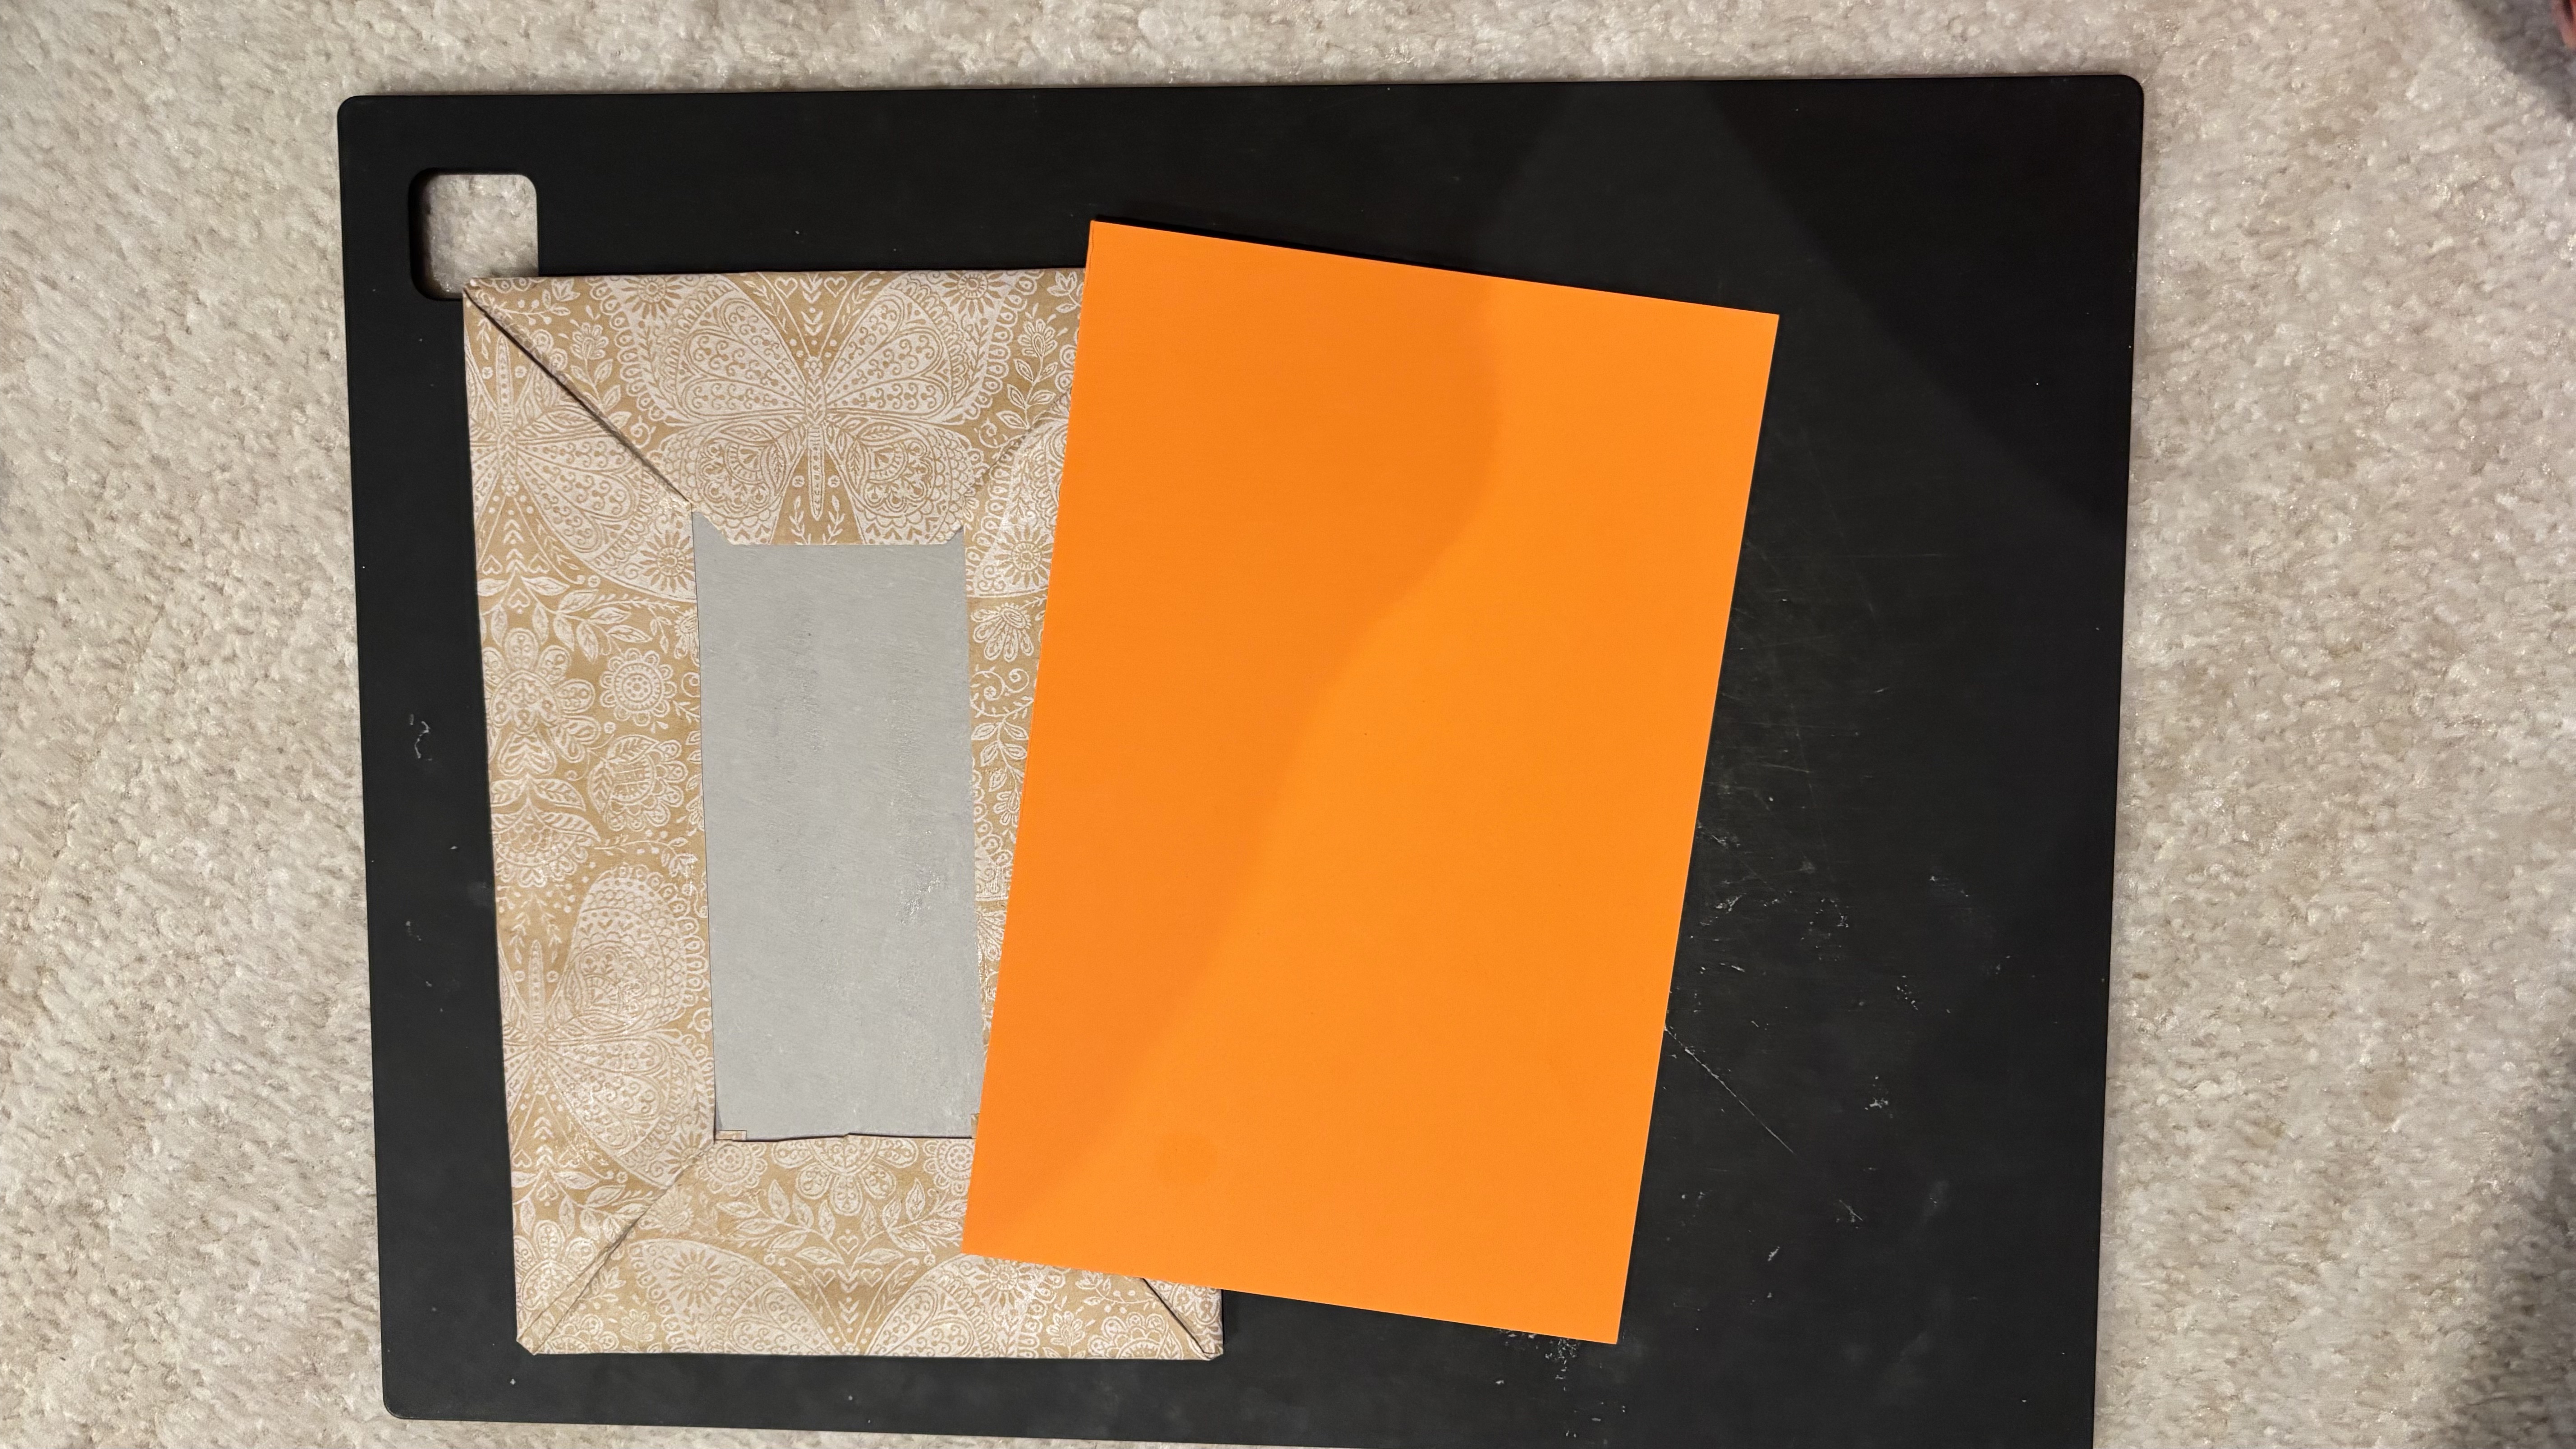
4a – A Clean Finish!
Let's give the inside of our covers a neat,
finished look! Cut two pieces of colored paper,
each the same size as the cardboard or slightly
smaller. Use a glue stick to attach them to the
inside of each cover, hiding the folded edges
of the decorative paper.
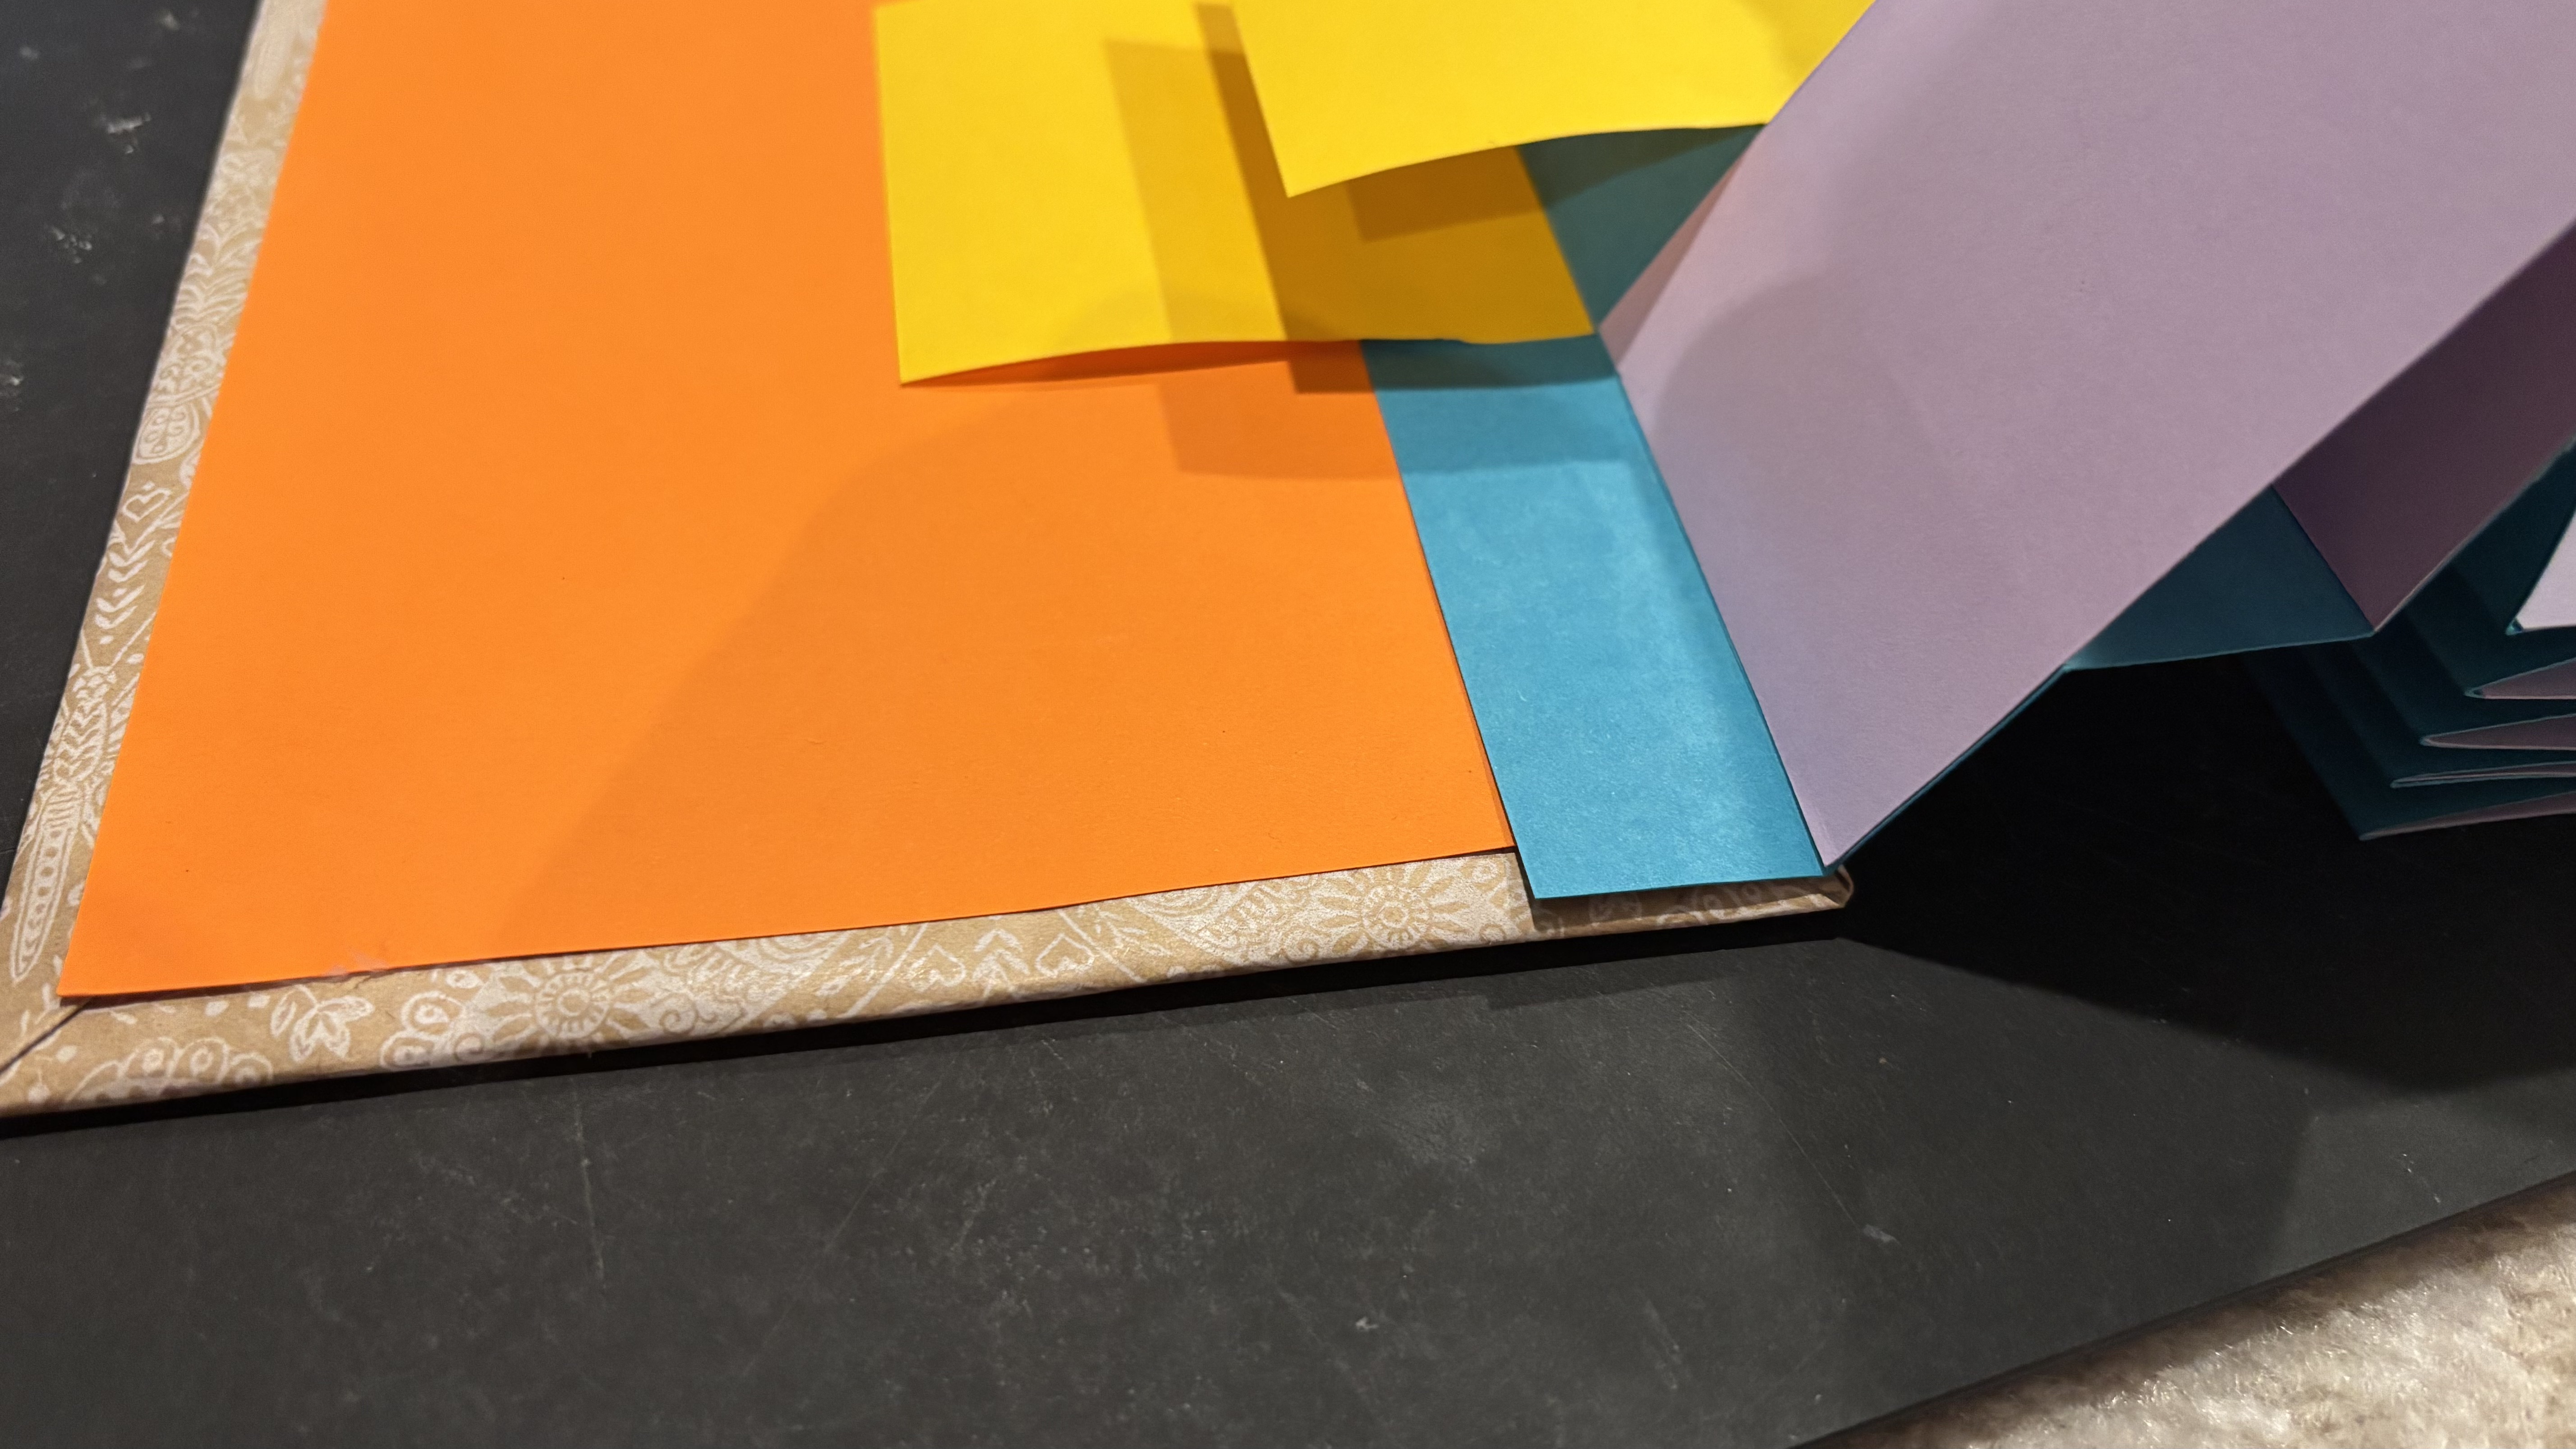
4b – Bringing It All Together!
Now it's time to connect everything! Apply glue
to the outermost section of the accordion spine
and attach it along the long edge of one cover,
directly on top of the colored paper we just
glued inside. Press gently to secure it in place.
Repeat the same process with the other end of
the accordion spine and the second cover.
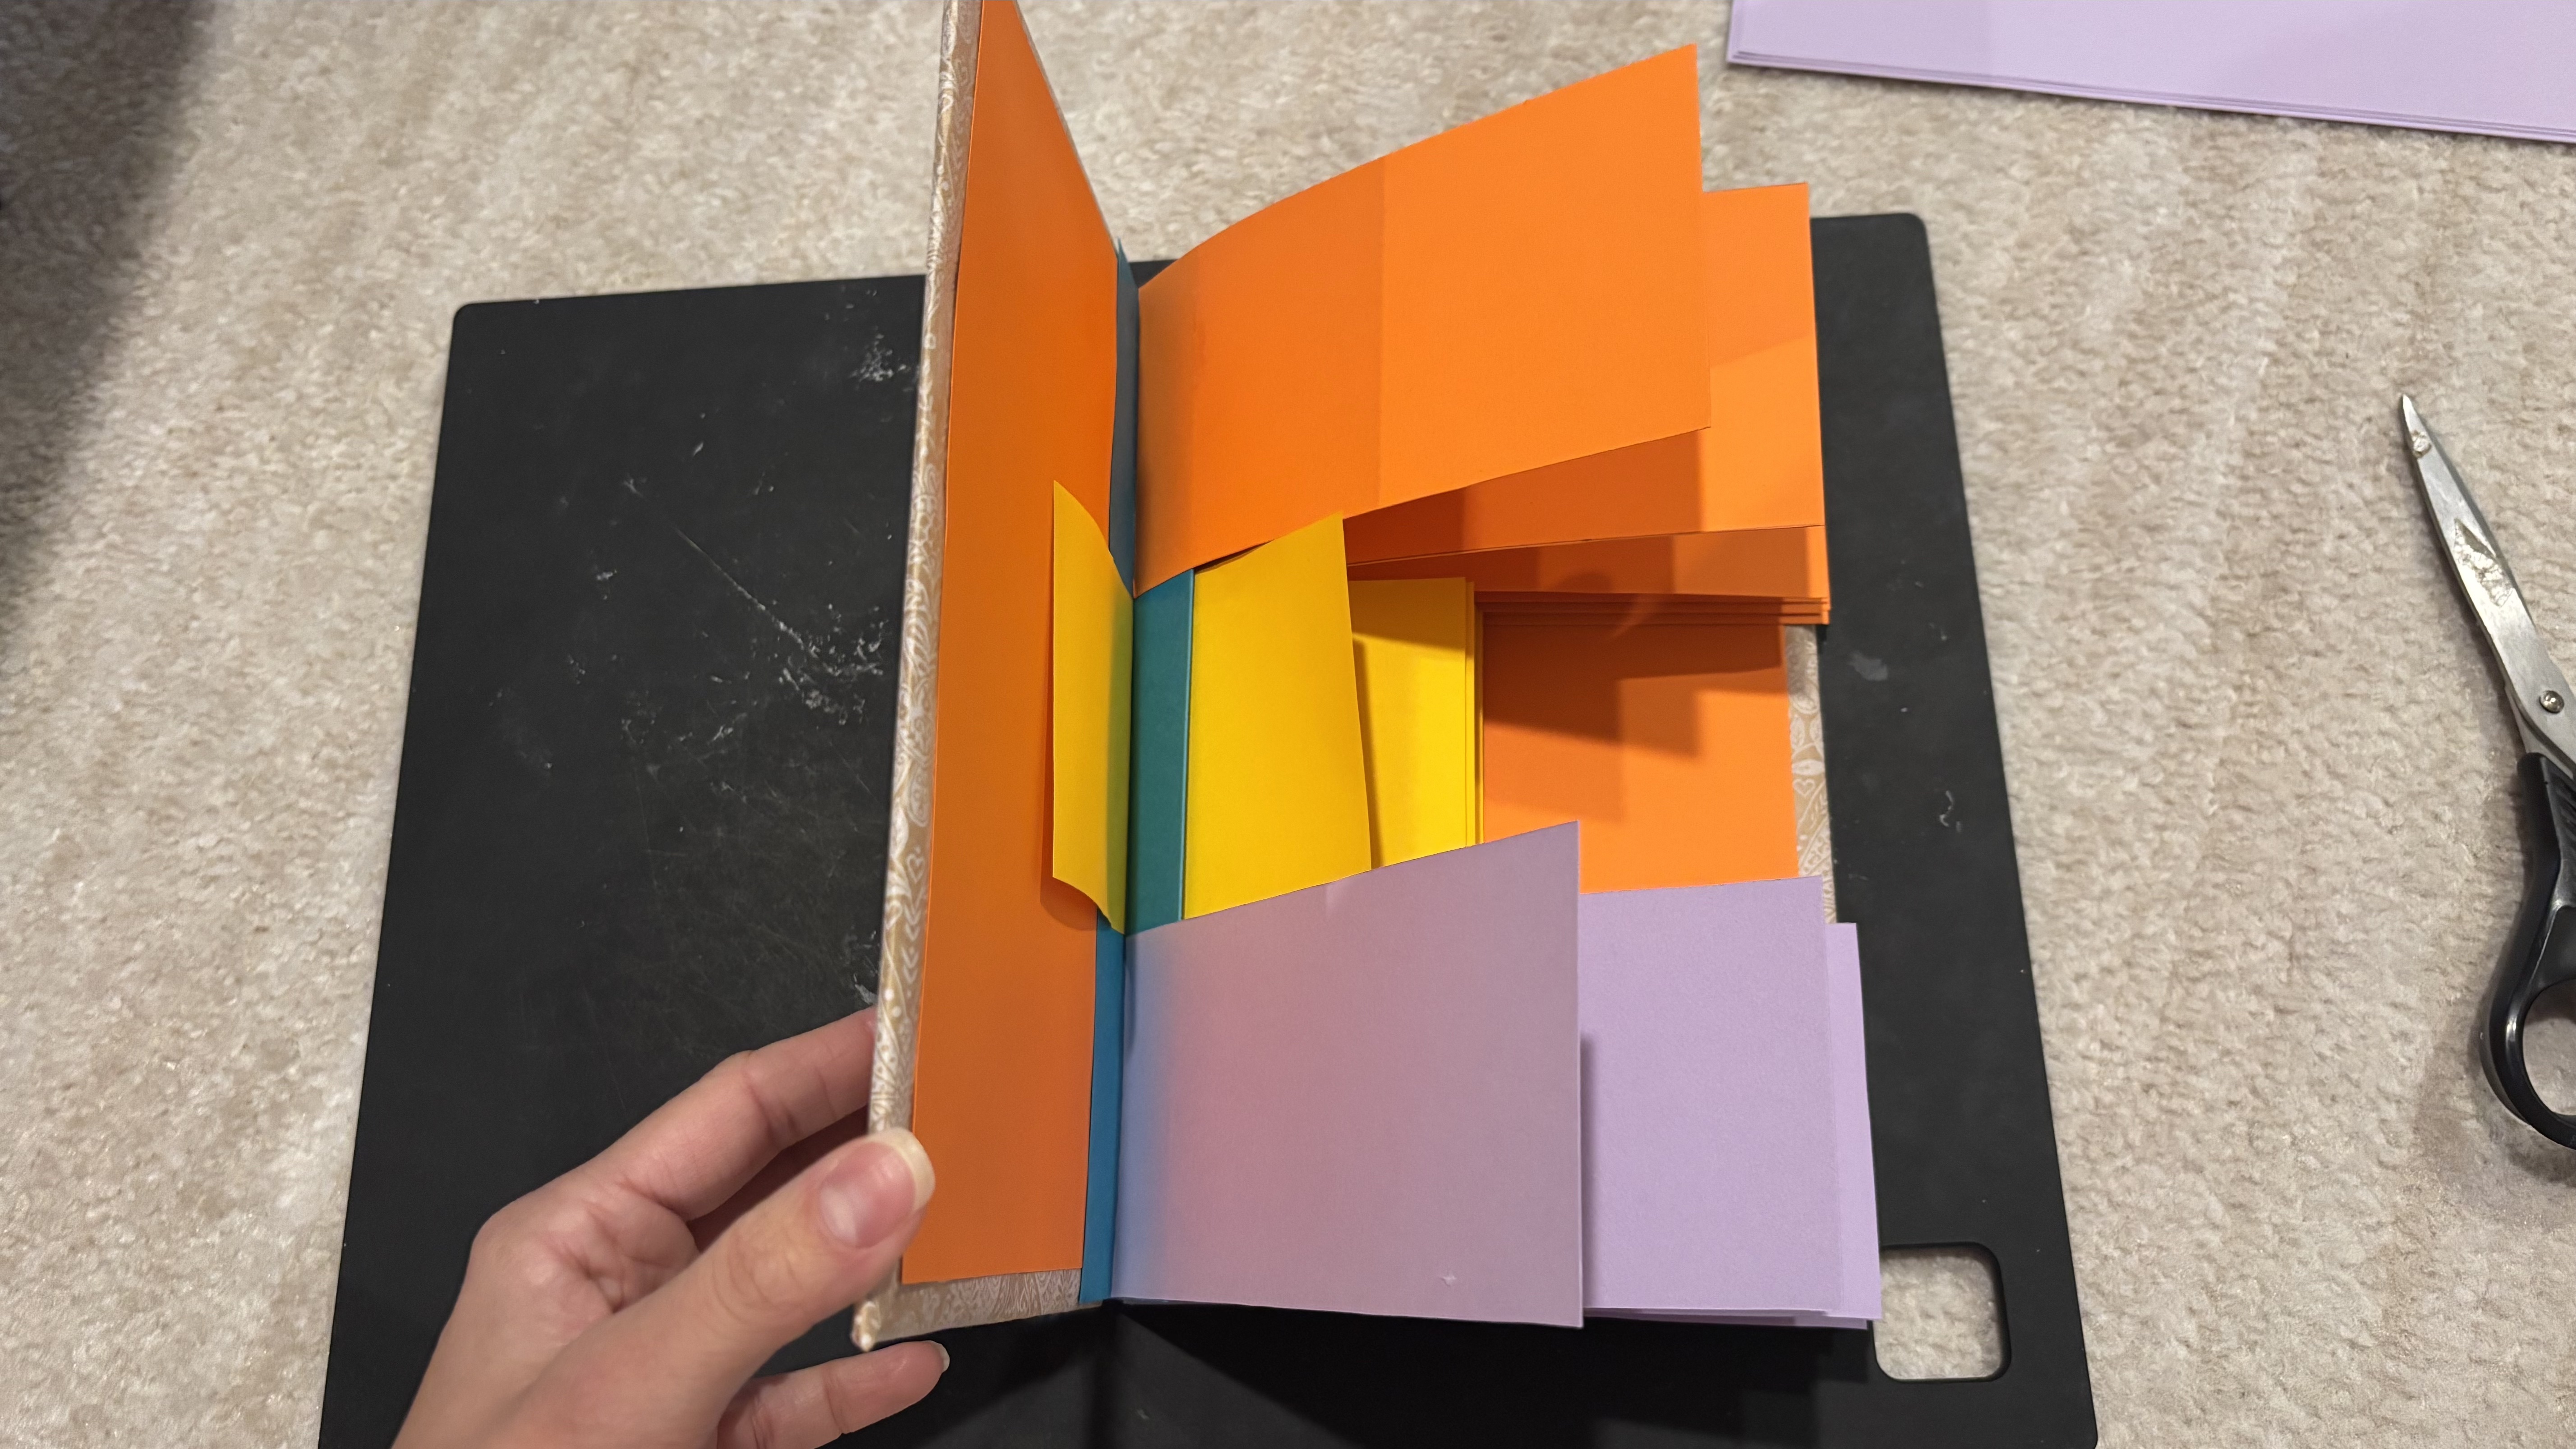
4c – Ta-Daaa! Your Flag Book Is Ready!
And there you have it—your very own handmade
flag book! Open it up, stretch out the accordion,
and enjoy how the colorful flags create a playful,
layered structure. Every fold, color, and
illustration makes your book one of a kind!
← Back to Teaching Daily